College life is busy, between classes, jobs, and a social life. Cooking often gets pushed to the back burner, but it doesn’t have to be complicated or time-consuming. If you’re looking for an easy, satisfying, and flavorful dish, Shakshuka is a great choice! This dish by Holly on Spendwithpennies.com only requires one-pot and 30 minutes of your time. Shakshuka is a simple combination of poached eggs in a spicy tomato sauce. Its origins are debated but it has early ties to many North African countries. Today Shakshuka is a very popular dish in both North Africa and Middle Eastern countries, people enjoy it for breakfast, lunch, and dinner at home and in restaurants. It is also easy to customize and can be based on your preferences or adjusted depending on what’s in your pantry. Not only is it delicious and easy, but it is also nutritious, hearty, and perfect for any meal of the day!
Cost Breakdown
| Ingredient | Amount Needed for Recipe | Unit Cost of Ingredient | Recipe Cost for Ingredient |
| Olive oil | 1 Tbsp | $8.23 (1 bottle; 16 oz) | $0.26 |
| Onion (Diced) | 1 medium onion | $2.88 (1 med onion; 8 oz) | $2.30 |
| Cloves Garlic (Minced) | 2 cloves | $4.28 (1 head garlic; 3 oz) | $1.80 |
| Small Red Bell Peppers (Diced) | 2 small | $2.96 (2 small peppers; 3 oz) | $2.96 |
| Paprika | 1 tsp | $1.12 (1 bottle; 2.5 oz) | $0.19 |
| Cumin | 1 tsp | $1.28 (1 bottle; 2.5 oz) | $0.22 |
| Ground Coriander | 1/2 tsp | $4.36 (1 bottle; 1.5 oz) | $0.36 |
| Cayenne Pepper | 1/8 tsp | $3.77 (1 bottle; 2.25 oz) | $0.08 |
| Salt/Pepper | to taste | $1.76 (1 bottle; 5.25 oz) | $0.05 |
| Canned Whole Tomatoes | 28 oz can | $1.48 (1 can; 28 oz) | $1.48 |
| Eggs | 6 | $3.42 (6 count; 10.5 oz) | $3.42 |
| Chopped Fresh Cilantro | 1 Tbsp | $0.76 (1 bunch; 2.8 oz) | $0.38 |
| TOTAL RECIPE COST | $13.50 | ||
| Cost Per Serving | $3.38 |
Recipe Making Process
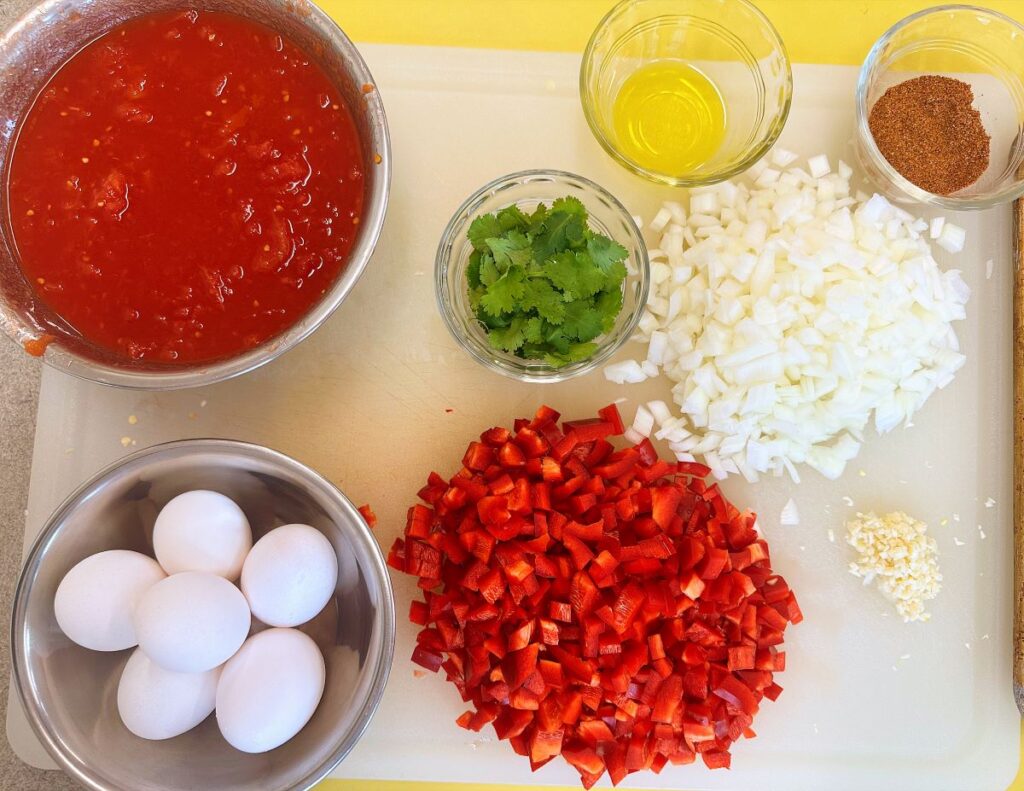
Shakshuka is a simple sauce made up of red peppers, onions, and tomatoes. It is seasoned with incredible spices and cooked until it is a thick sauce. Red peppers are a great source of vitamin C, E, and A. Vegetables can be hard to incorporate into a college diet, but the benefits and nutrients they provide are crucial to a healthy diet. This recipe makes incorporating vegetables both easy and delicious.
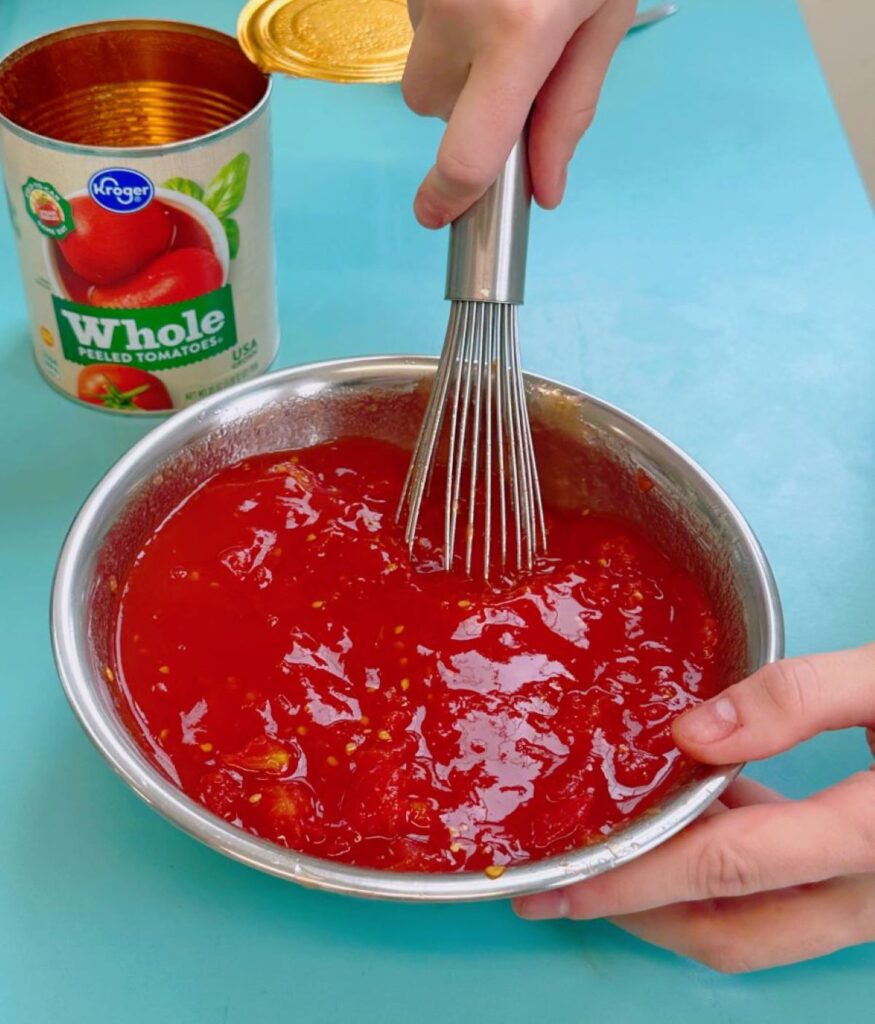
The tomatoes are the bulk of the sauce and create a depth of flavor in the recipe. Fresh tomatoes are not always in season and can be quite expensive. Don’t fret! Canned tomatoes are an affordable and accessible option for college students. Canned tomatoes are a great way to save money for this recipe and they allow for a mess-free prep. Tomatoes are a great source of antioxidants and vitamins. Not only that, but they are truly tasty.
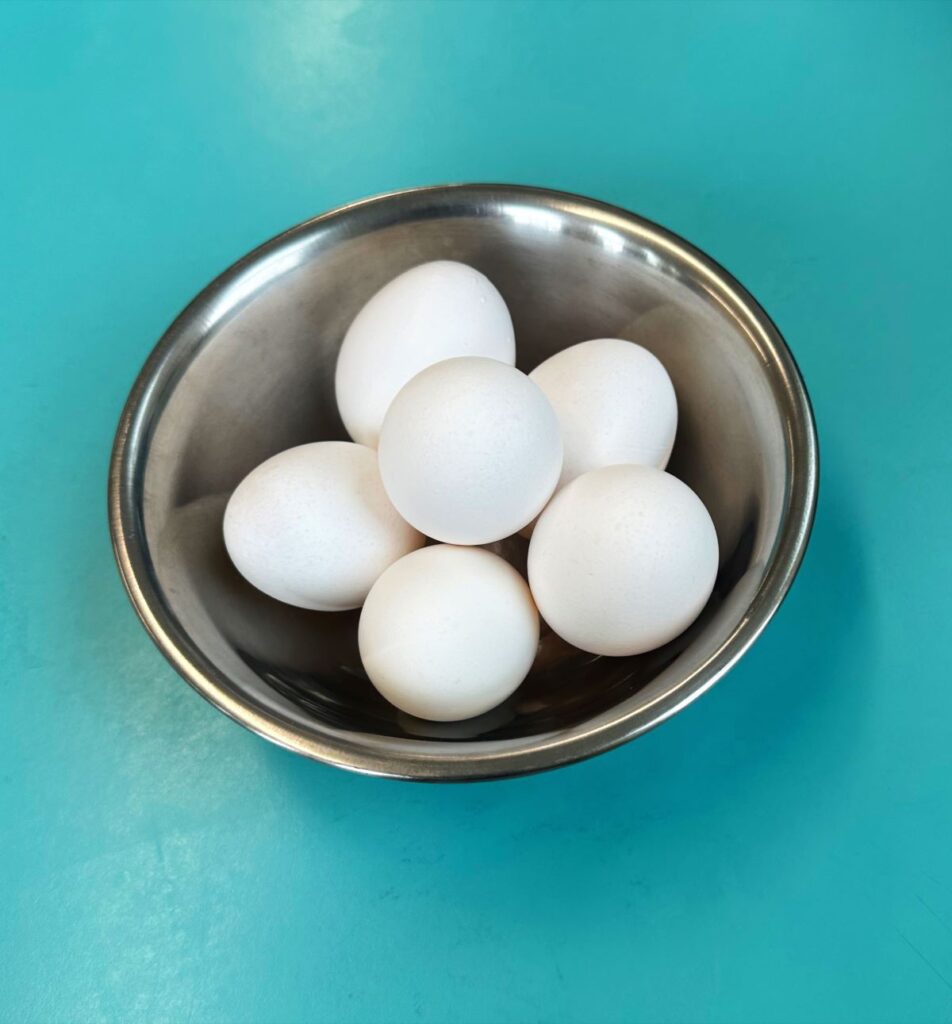
Eggs create a great source of protein within this recipe. Protein is an important part of a balanced and satisfying meal.
Shakshuka is simple and easy to make:
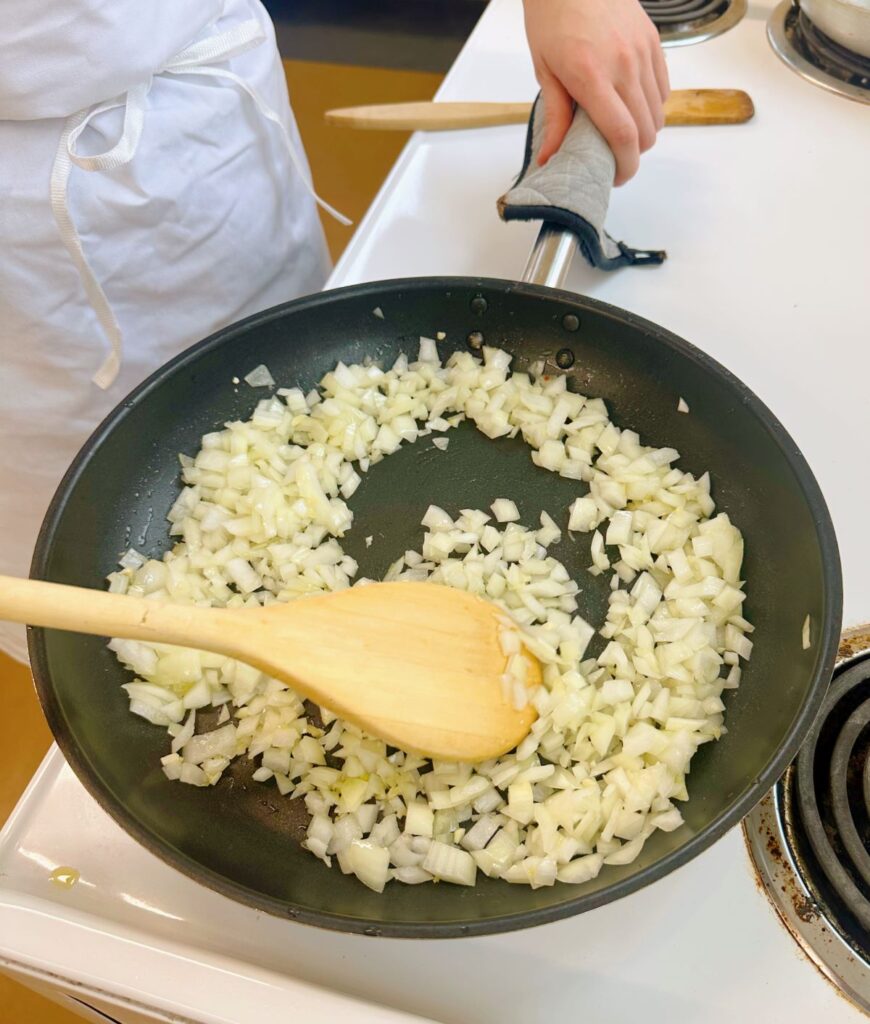
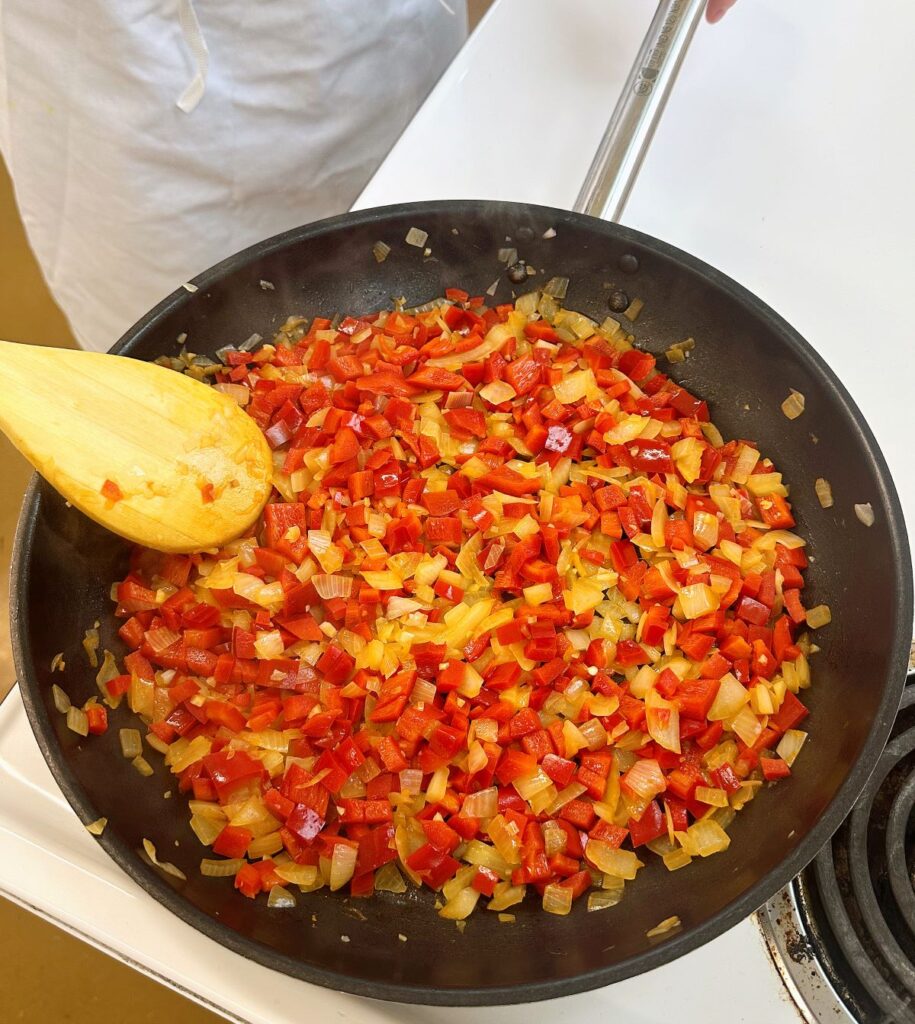
- Add onions and garlic to a pot and cook until tender
2. Add diced red pepper and seasoning. Adjust seasonings to taste.
3. Add tomatoes and cook until thickened on simmer
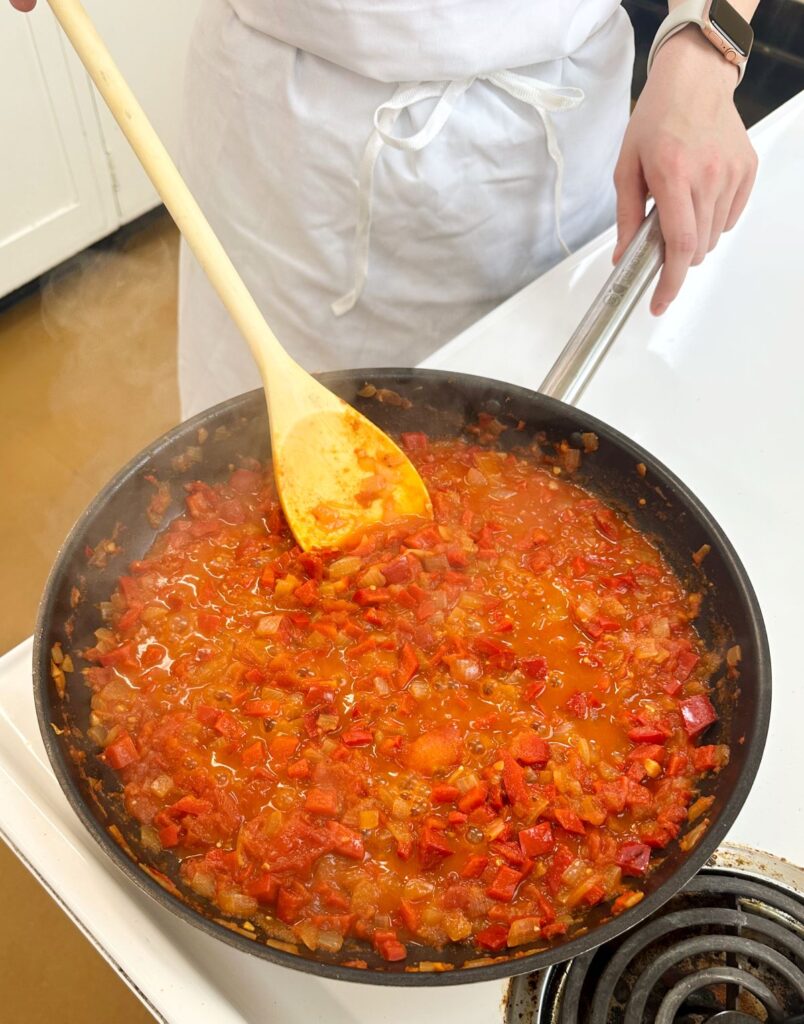
Cooking the onions and garlic together creates a fragrant and flavorful meal. Adding the seasonings is crucial to the flavor and spice of this dish. The level of spice can be completely up to you!
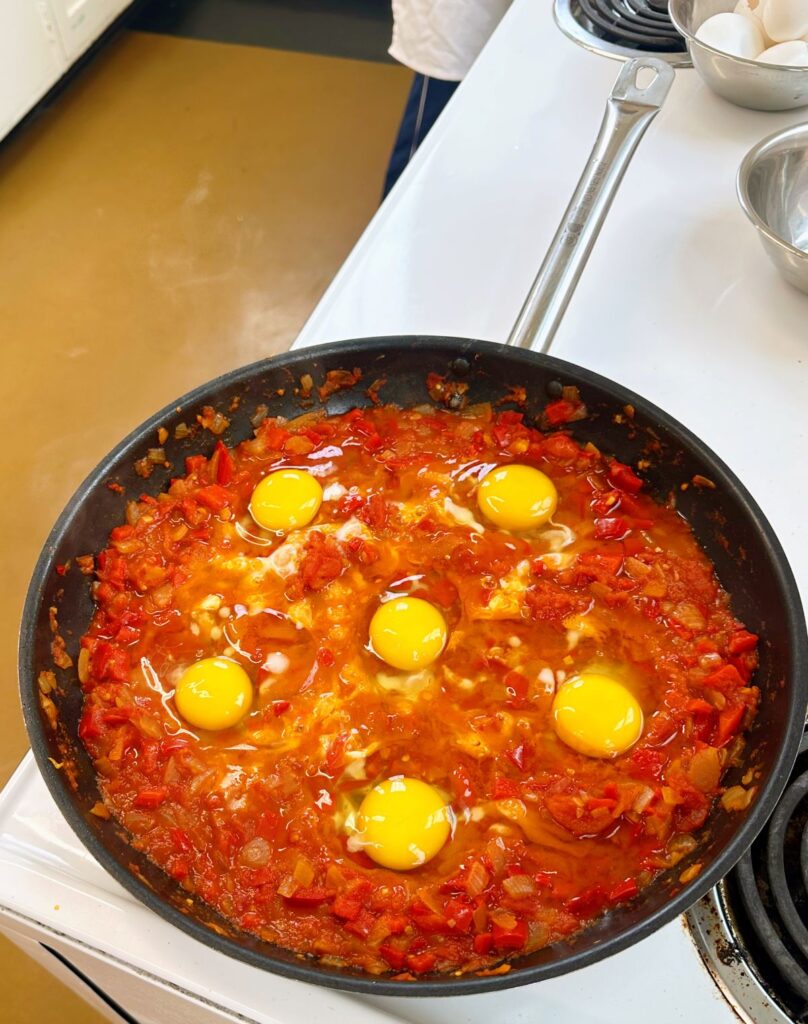
From here, all you have to do is cook the eggs, right there in the pan by creating little wells for them to sit in. No extra dishes necessary!
Shakshuka can be stored in the refrigerator for up to 3 days. It is great for meal prepping and is easy to reheat on a stressful day for a college student!
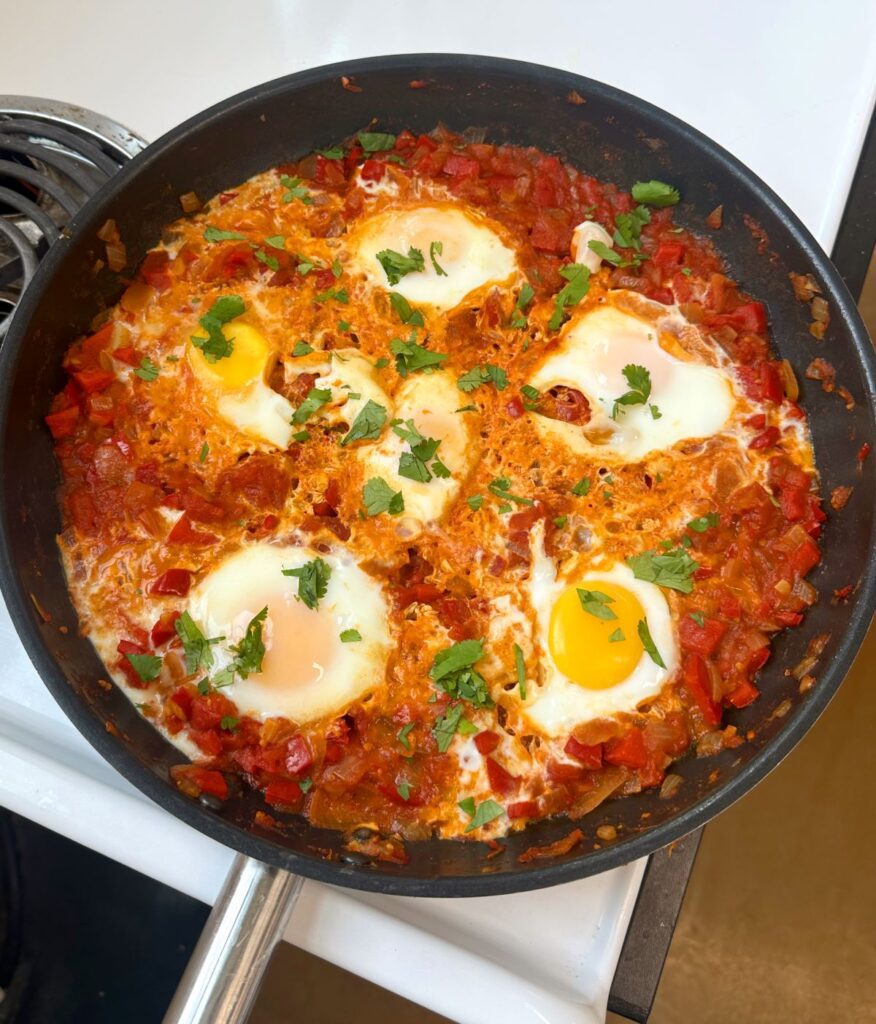
Shakshuka is best served with toasted bread or roasted potatoes.
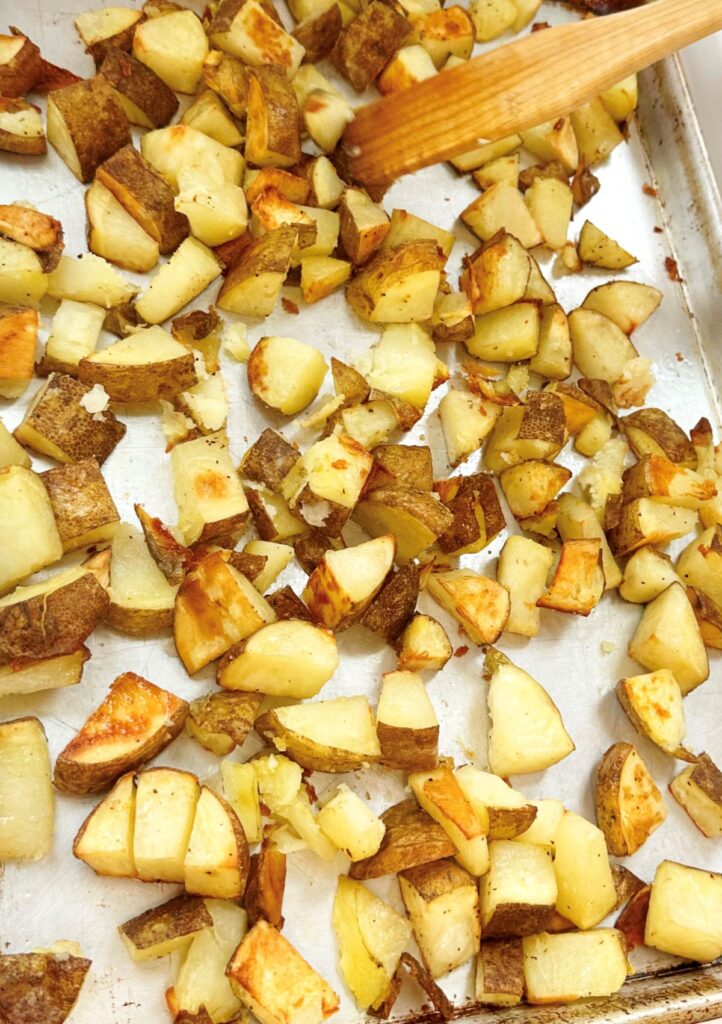
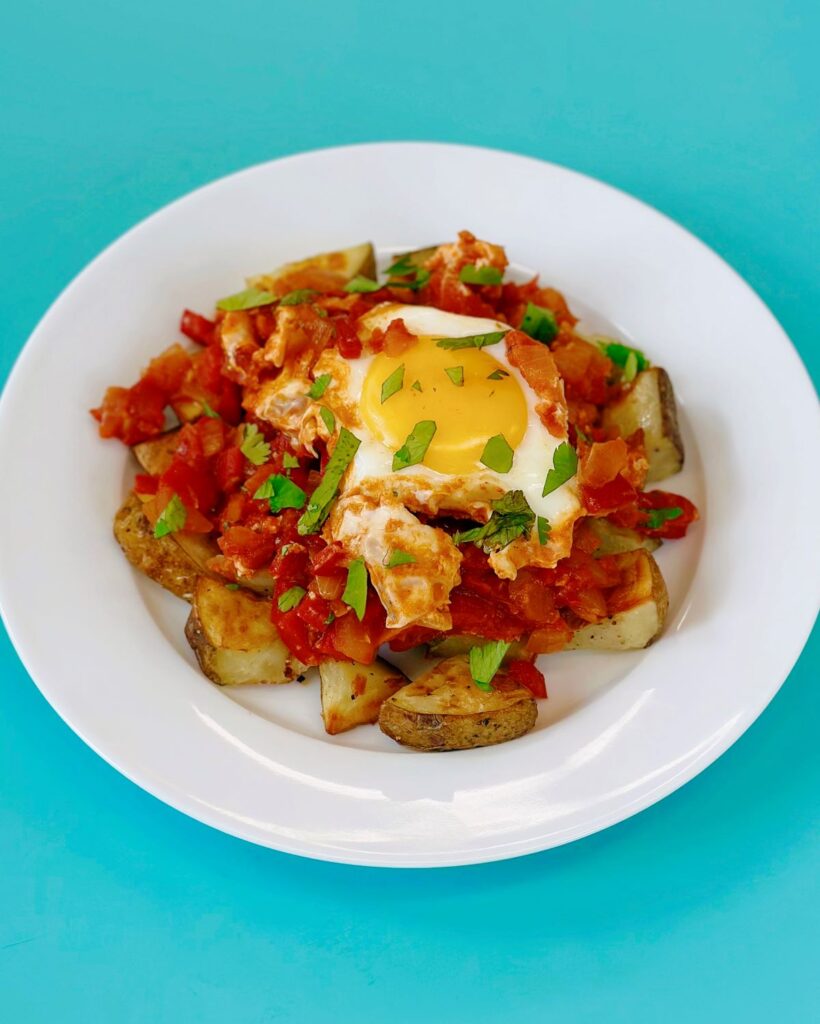
Easier than it sounds Shakshuka
Description
A simple, one pan nutritious meal for anytime of day.
Ingredients
Instructions
- Crush tomatoes with your hands (or a whisk) until they’re broken up, set aside.
- In a 10″ skillet, cook onions and garlic in oil until tender. Add bell pepper and cook an additional 6-7 minutes or until very soft.
- Add seasonings and cook until fragrant, about 1 minute. Add tomatoes and simmer until thickened, about 10 minutes.
- Use the back of the spoon to gently create wells for the eggs. Crack an egg into each well.
- Turn skillet down to simmer, cover with a lid, and gently simmer for 4-6 minutes or until eggs are set.
- Garnish with fresh cilantro and serve with toast or roasted potatoes.
Video
Notes
- Store in an airtight container in the fridge for up to 3 days. Reheat in the microwave and refresh flavors with salt and pepper.


Cost Breakdown (Avocado Tuna Sandwich)
| Ingredient | Amount Needed | Unit Cost | Recipe Cost |
| Whole Grain Bread | 2 slices | $2.78/10 slices | $0.28 |
| Canned Tuna* | 1 can (5 oz) | $0.88/can | $0.88 |
| Avocado | 1 avocado | $0.70 each | $0.70 |
| Total Recipe Cost | $1.86 | ||
| Cost Per Serving | $1.86 |
Cost Breakdown (Cold Tuna Stuffed Pepper)
| Ingredient | Amount Needed | Unit Cost | Recipe Cost |
| Bell Pepper | 1 pepper | $0.86 each | $0.86 |
| Canned Tuna* | 1 can (5 oz) | $0.88/can | $0.88 |
| Greek Yogurt | 1/2 cup (4oz) | $3.54/32oz | $0.45 |
| Total Recipe Cost | $2.19 | ||
| Cost Per Serving | $2.19 |
Cost Breakdown (Tuna Melt)
| Ingredient | Amount Needed | Unit Cost | Recipe Cost |
| Whole Grain Bread | 2 slices | $2.78/10 slices | $0.28 |
| Canned Tuna* | 1 can (5 oz) | $0.88/can | $0.88 |
| Cottage Cheese | 1/2 cup (4 oz) | $2.94/24 oz | $0.49 |
| Total Recipe Cost | $1.65 | ||
| Cost Per Serving | $1.65 |
Cost Breakdown (Tuna Melt Stuffed Pepper)
| Ingredient | Amount Needed | Unit Cost | Recipe Cost |
| Bell Pepper | 1 pepper | $0.86 each | $0.86 |
| Canned Tuna* | 1 can (5 oz) | $0.88/can | $0.88 |
| Cottage Cheese | 1/2 cup (4 oz) | $2.94/24 oz | $0.49 |
| Total Recipe Cost | $2.23 | ||
| Cost Per Serving | $2.23 |
Cost Breakdown (Optional Add-ins**)
| Ingredient | Amount Needed | Unit Cost | Recipe Cost |
| Tomato | 1/2 tomato | $0.32 / tomato | $0.16 |
| Black Beans* | 1/4 cup (2 oz) | $0.86 / 15 oz | $0.11 |
| Pickles | 1 whole pickle | $2.26 / 24 oz | $0.10 |
| Cheese | 1/4 cup (2 oz) | $1.97 / 8 oz | $0.49 |
| Mustard | 1 oz | $0.98 / 20 oz | $0.05 |
| Greens | 1/2 cup | $1.48 / bunch | $0.37 |
| Hard Boiled Eggs | 1 egg | $5.97 / dozen | $0.50 |
| Pesto | 1 oz | $2.48 / 7 oz | $0.35 |
| Hot Sauce | 1 oz | $1.98 / 7 oz | $0.28 |
| Total Recipe Cost | VARIES | ||
| Cost Per Serving | VARIES |
*Items commonly stocked at SNAC
**Costs will fluctuate with different add-ins. Use ingredients you already have at home for no extra cost.
Recipe Making Process
Cold Sandwich:
- Mix 1 can of tuna with either 1 avocado or ½-1 c. greek yogurt (enough to just barely hold together the mixture)
- Spread over bread to create an easily transportable lunch, eat like a dip with cucumber slices for a snack, or fill a halved bell pepper for a more light, refreshing meal
- Add-ins can be incorporated directly into the mixture or layered with it when assembled


Tuna Melt:
- Mix 1 can of tuna with ½-1 cup cottage cheese (enough to just barely hold together the mixture
- Spread over toasted bread or fill a halved bell pepper, then broil on high for 10 minutes, or until the top forms a golden-brown crust
- Add-ins can be incorporated directly into the mixture or layered with it when assembled

Tuna Sandwich Four Ways
Description
This versatile tuna sandwich recipe is perfect for college students looking for a quick, affordable, and nutritious meal. It swaps traditional mayo for healthier alternatives like Greek yogurt, cottage cheese, or avocado, boosting protein and heart-healthy fats. Whether you prefer a cold sandwich, a crunchy bell pepper boat, or a warm tuna melt, this recipe is a great way to add more protein and fiber to your diet while keeping meals delicious and easy to prepare.
Ingredients
Cold Sandwich
Tuna Melt
Instructions
- Mix 2 cans of tuna with either 1 avocado or ½-1 cup of Greek yogurt (just enough to hold the mixture together).
- Spread over whole-grain bread for a classic sandwich.
- Alternatively, serve as a dip with cucumber slices or fill a halved bell pepper for a lighter, crunchy meal.
- Add any optional add-ins like tomatoes, leafy greens, pickles, or mustard either directly into the mixture or layered on the sandwich.
- Mix 2 cans of tuna with ½-1 cup of cottage cheese (enough to hold together).
- Spread over bread or fill a halved bell pepper. If desired, sprinkle with shredded cheese.
- Broil on high for about 10 minutes or until the top is golden and slightly crispy.
- Add toppings like cheese, tomatoes, pesto, or hot sauce for extra flavor.
Cold Sandwich
Tuna Melt
Video
Notes
- Optional Additions:
1 tomato, sliced
1 can black beans
1 cucumber, sliced
Pickles
Cheese (pepper jack, cheddar, or a blend)
Greens (arugula, kale, or lettuce)
Dijon mustard
Basil pesto
Hot sauce or buffalo sauce
Additional Seasonings:
Mustard
Garlic
Dill
Red pepper flakes
Black pepper
Lemon juice - Make-Ahead & Storage: Store tuna mixture in an airtight container in the fridge for up to 3 days.
How to Serve: Serve with a side of whole-grain crackers, fresh fruit or veggies, or a simple salad. Additionally, this is perfect for tossing in a lunchbox or fold-top bag for an on-the-go meal!
Scaling the Recipe: Easily double or halve the ingredients based on how many servings you need. One can of tuna is generally enough for one full sandwich, but can easily spread farther with more add-ins.
Variations: Try different seasonings, swap in different cheeses, or use alternative bread options like wraps or lettuce cups.
This recipe only requires a simple oven bake that beginner cooks everywhere can master. This is perfect for first time college students seeking a wholesome meal while not breaking the budget. The recipe is extremely versatile. You can add or remove anything you like to make this your own! Make it ahead or enjoy it fresh and add a little bit of Greek life to your meals!
Cost Breakdown
| Ingredient | Amount Needed for Recipe | Unit Cost for Ingredient | Recipe Ingredient Cost |
| Chickpeas, dried | 1 can | $0.86/1 can | $0.86 |
| Fresh parsley | 1 cup | $1.78/oz | $1.78 |
| Fresh dill | 1 cup | $1.78/oz | $1.78 |
| Yellow onion | 2 each | $0.66 | $1.32 |
| Black pepper | 1/2 tsp | $3.12 / 3 oz | $0.99 |
| Cayenne powder | 1/4 tsp | $4.12/ 5.2 oz | $0.03 |
| Coriander | 1/4 tsp | $3.99 / 1.48 oz | $0.11 |
| Cumin, ground | 1/2 tsp | $1.99 / 1.62 oz | $0.10 |
| Flour | 1 tbsp | $1.32 / 2 lb (32 oz) | $0.21 |
| Garlic | 6 cloves | $0.67 / 1 head | $0.40 |
| Baking powder | 1 tsp | $3.59 / 8 oz | $0.06 |
| White rice | 2 cups | $0.92/ 2.5 cups | $0.74 |
| Dill weed | 1 tsp | $1.99 / 0.75 oz | $0.44 |
| Chicken broth | 2 cups | $0.99/4.5 oz | $3.52 |
| Lemon | 1 each | $0.58 each | $0.58 |
| Cucumber | 1 each | $0.66 each | $0.66 |
| Lemon juice | 3 tbsp | $3.33/32 oz | $0.16 |
| Feta cheese | 2 oz | $4.26/ 6 oz | $1.42 |
| Red onion | 1 each | $0.90 each | $0.90 |
| Tomato | 2 each | $1.43 each | $2.86 |
| Greek yogurt | 1 cup | $0.72 / 5.3 oz | $0.54 |
| Olive oil | 2-3 tbsp | $11.97/25.4 oz | $0.71 |
| TOTAL RECIPE COST | $19.27 | ||
| Cost per serving (4 servings) | $4.82 |
Recipe Making Process
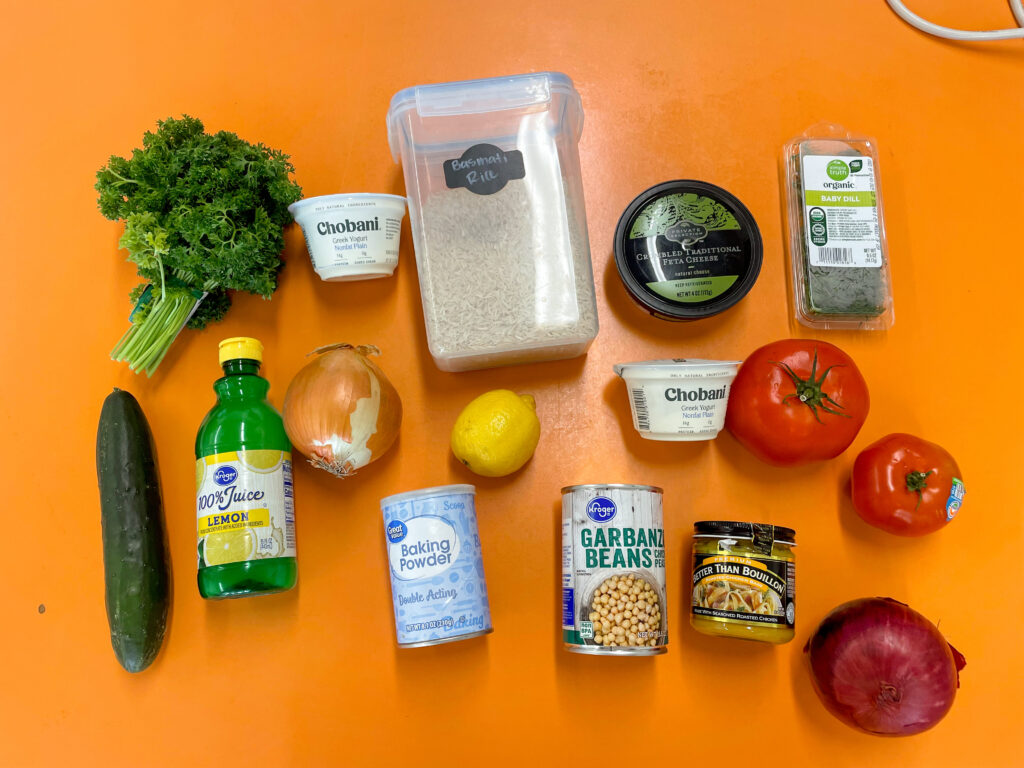
Before starting any recipe, it’s essential to gather all your ingredients. For this falafel bowl, you’ll need chickpeas (either canned or dried), garlic, onion, fresh herbs (parsley and cilantro), cumin, coriander, paprika, lemon juice, chicken broth, dill weed, white rice, and olive oil. For the bowl itself, add some tomatoes, cucumbers, onions or any other topping that you would enjoy! You will finish it off with tahini dressing made with yogurt, lemon juice, cucumber, garlic, and dill.
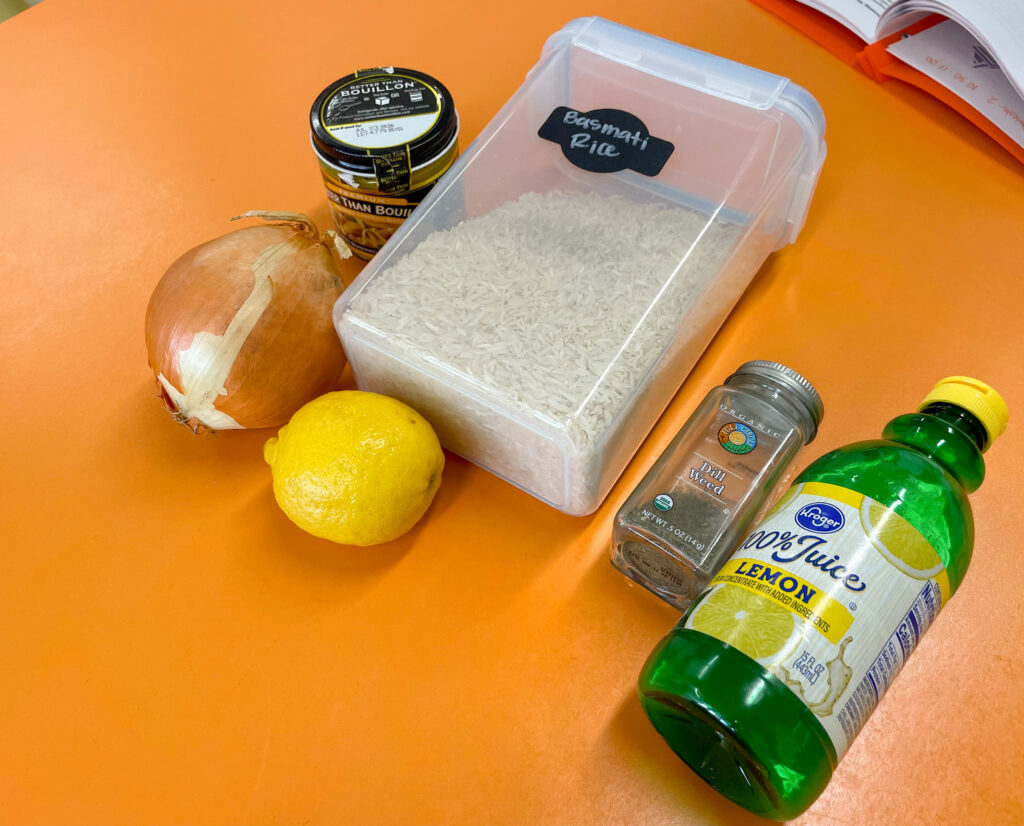
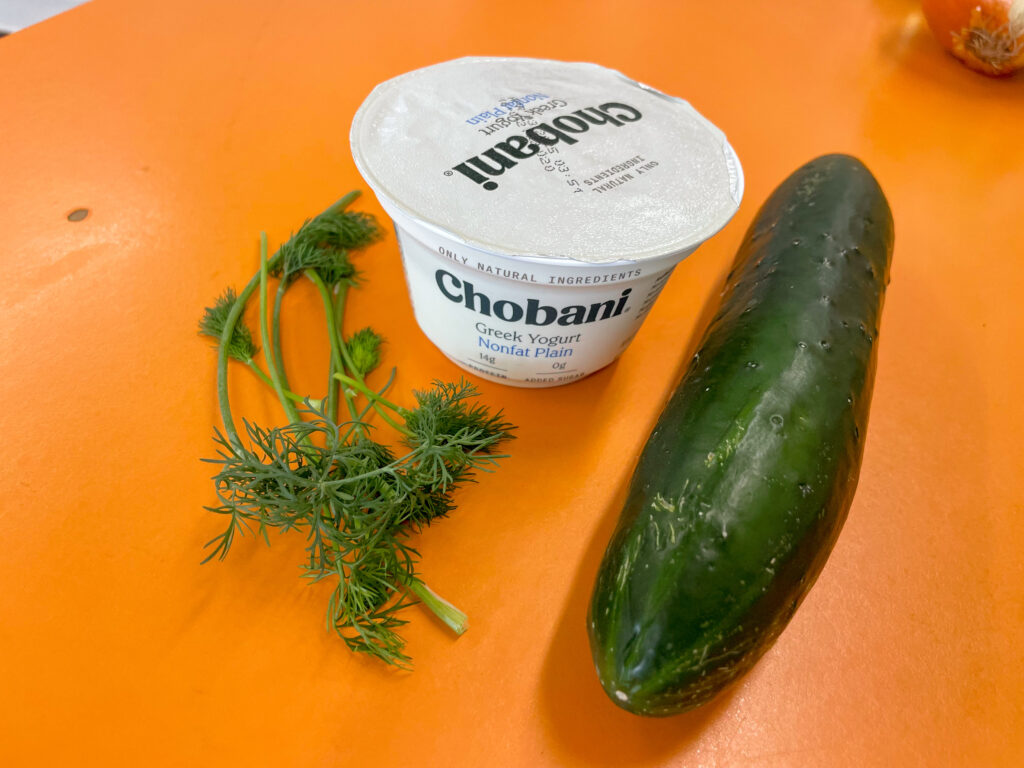
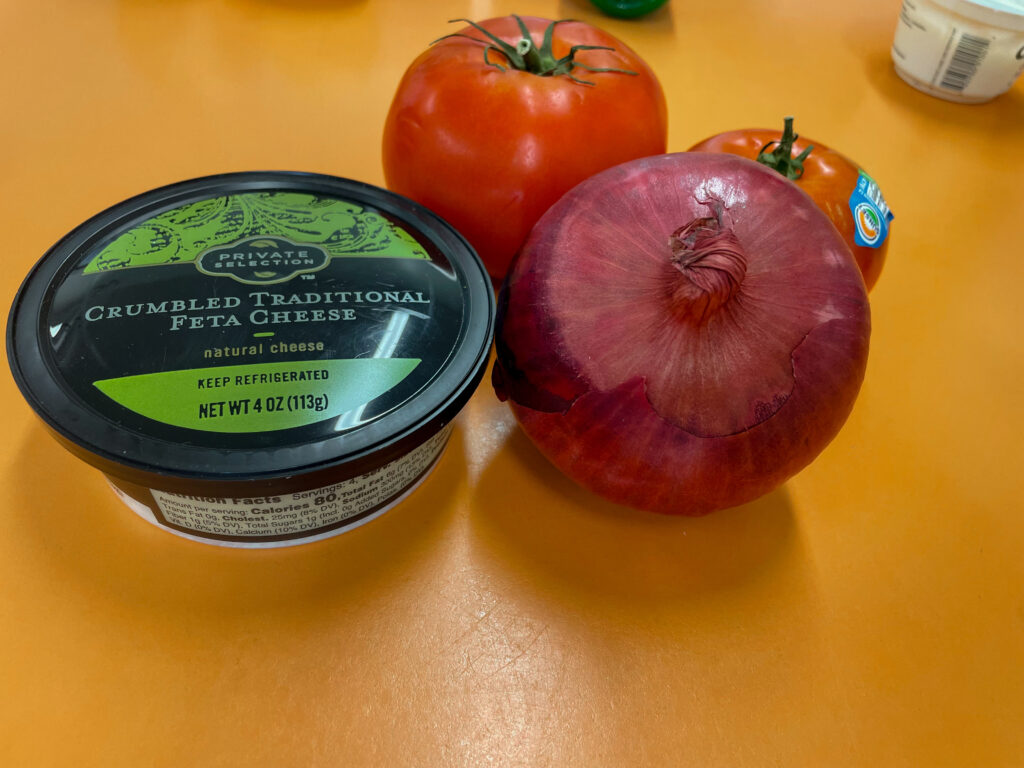
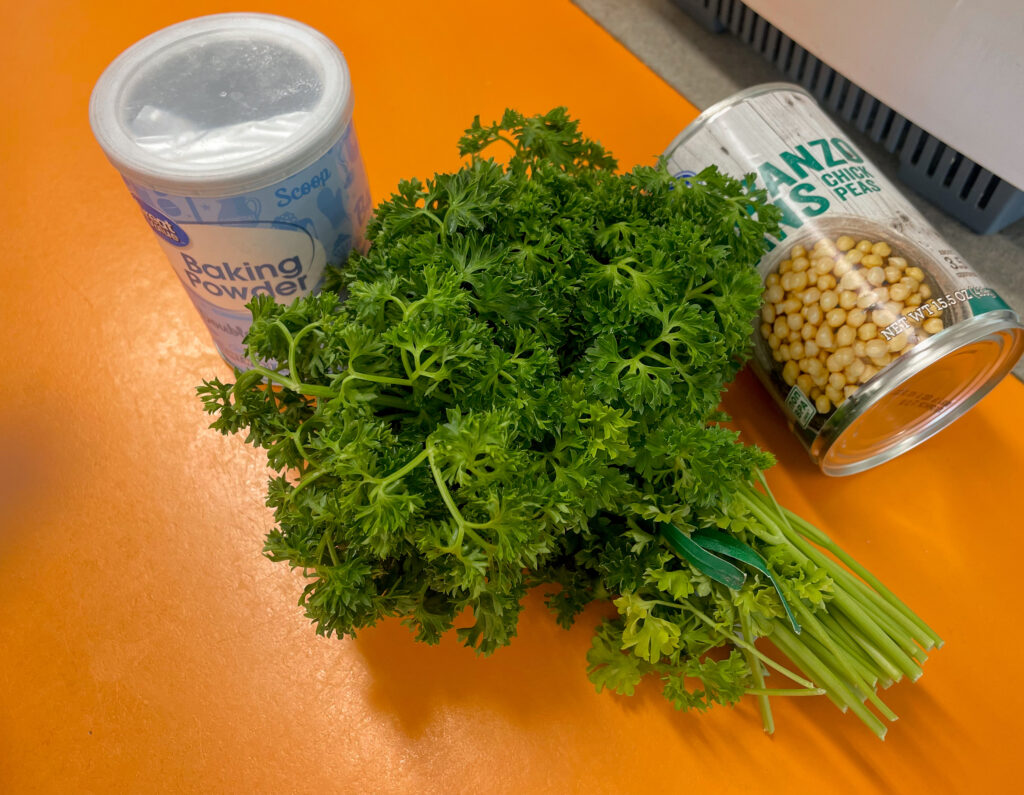
Start by draining and rinsing your chickpeas if using canned. Then, pulse the chickpeas, garlic, onions, fresh herbs, and spices (cumin, coriander, paprika) in a food processor. The key here is to pulse the ingredients, not puree them, as you want a texture that holds together but still has some bite. Next, shape the falafel mixture into small balls or patties, about 1-2 inches in diameter. The mixture should stick together, but don’t worry if it’s a little crumbly. You can gently press it together to form a nice ball shape.
Preheat your oven to 400°F (200°C) and place the shaped falafel on a baking sheet lined with parchment paper. Brush them lightly with olive oil and bake for 20-25 minutes, flipping halfway through, until golden brown and crispy.
While those are cooking, begin cooking the rice. Rinse the rice, giving it some time to soak. Cut the onions and garlic and add them in. Then, add the broth and lemon juice and bring to a boil. Cover and cook for 20 minutes and then allow it to sit untouched for at least 10 minutes, then stir in the fresh dill.
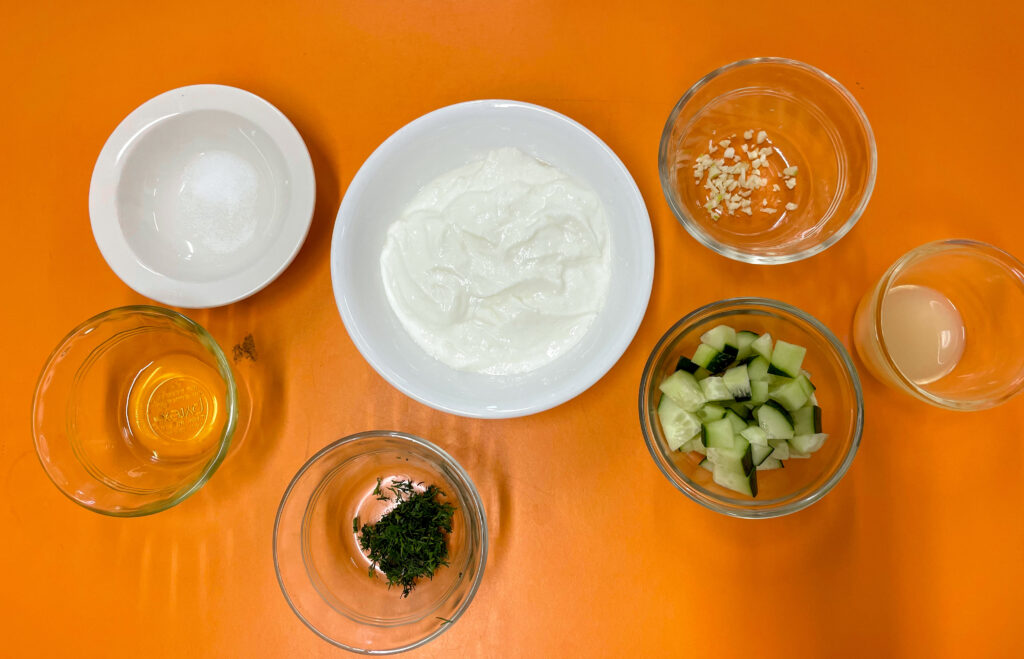
The final thing you will have to prepare is the tahini dressing. This is really straight forward, just combine the diced cucumber, yogurt, lemon juice, garlic, salt, oil, and dill. Mix together, and you are ready to start assembling!
You can get creative with the toppings. We chose tomato, onion, cucumbers, feta cheese, and lemon. However, you can customize this recipe to your liking! It can be catered to your own prefrence! This is a great option for meal prepping or you can easily prepare this day of!
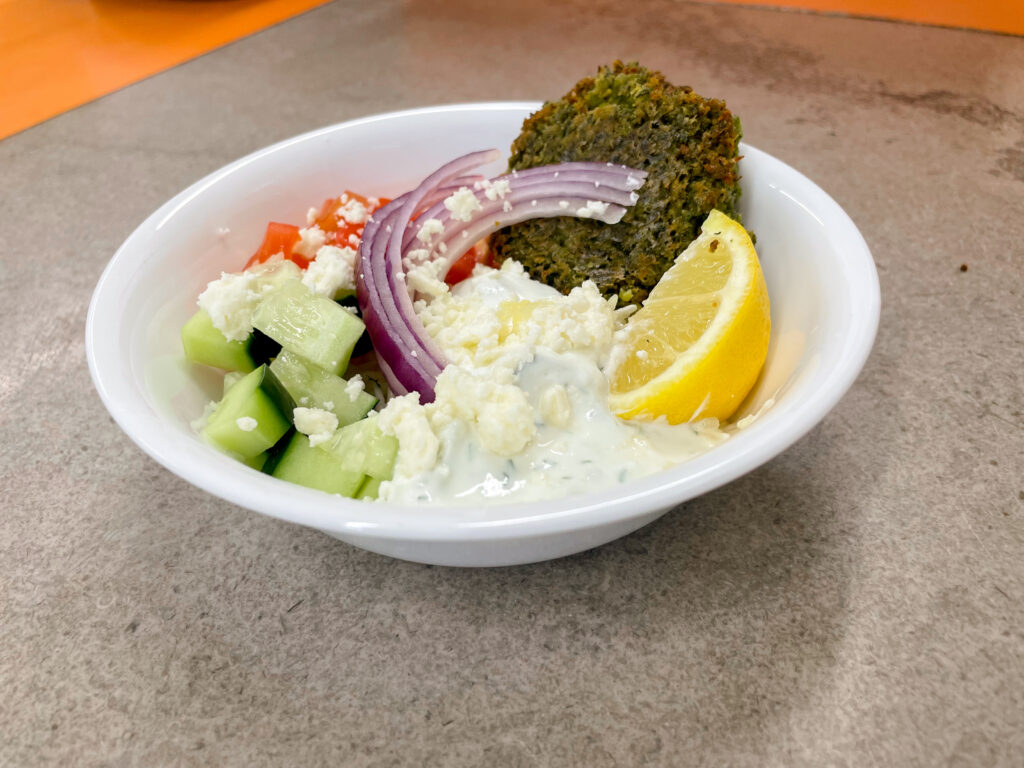
Easy Mediterranean Bowls
Description
This recipe is perfect for beginner cooks trying to increase their skillset. It is delicious, nutritious, and easy to master!
Ingredients
For falafel:
For rice:
For sauce:
Instructions
- Drain and rinse the canned chickpeas. Add the fresh parsley, fresh dill, diced yellow onion, seasonings, baking powder, and coconut flour to a food processor. Then add the chickpeas on top of everything (for easier blending).
- Pulse until all of the falafel ingredients are minced and combined. Note: you may need to use a rubber spatula to push down the sides and ensure the chickpeas are blended.
- Transfer the mixture to a glass bowl and use a wooden spoon to toss again.
- Preheat the oven to 400°F and line a baking sheet with parchment paper.
- Use a cookie scooper to scoop falafel. Use your hands to form them into small patties (recipe makes ~12).
- Place falafel onto baking sheet and then drizzle generously with olive oil (this is how the falafel becomes crispy and golden brown since we’re not frying them).
- Bake for 12 minutes. Flip the falafel over (drizzle with more olive oil if needed) and bake for another 12 minutes.
- While the falafel is baking, make the Lemon Rice and prep any additional fresh vegetables you plan to serve with it. Mix together the sauce ingredients.
- After the falafel is cooked, allow it to cool for at least 10 minutes (helps the patties hold their shape). Serve over rice, tahini sauce, fresh pita, and greek salad (I do a mix of cucumbers, tomatoes, feta cheese, tossed in some gyro seasoning and olive oil)!
- Pack it up for meal prep or serve it warm! Enjoy!
Cost Breakdown
| Ingredient | Amount Needed For Recipe | Unit Cost of Ingredient | Recipe Ingredient Cost |
| Eggs | 10 | $5.97/12 eggs | $4.98 |
| Cottage Cheese | 1/2 C. (4oz) | $2.94/24 oz | $0.49 |
| Shredded Ham | 1 C. (6oz) | $3.24/8 oz | $2.43 |
| Spinach | 1/2 C. (1oz) | $2.18/6 oz | $0.36 |
| Swiss Cheese | 1/2 C. (2oz) | $4.22/16 oz | $0.53 |
| Salt | 1/2 tsp. (.01oz) | $0.67/26 oz | $0.01 |
| Pepper | 1/4 tsp (.05oz) | $2.08/1.5 oz | $0.01 |
| Total Cost | $21.30 | $8.81 Total per serving: $1.47 |
Process
- This recipe has a ton of variations! There are so many optional ingredients that you can load these breakfast egg muffins with to accommodate different dietary needs! We chose to use shredded ham, spinach, and Swiss cheese, but feel free to use whatever add-ins you already have in the fridge at home. By following this approach, you can prepare a meal that is both more budget-friendly and minimizes food waste.
- Before you begin cooking, gather and prepare all your ingredients and tools in advance. This will help streamline the process, ensuring efficiency and preventing unnecessary movement around the kitchen.
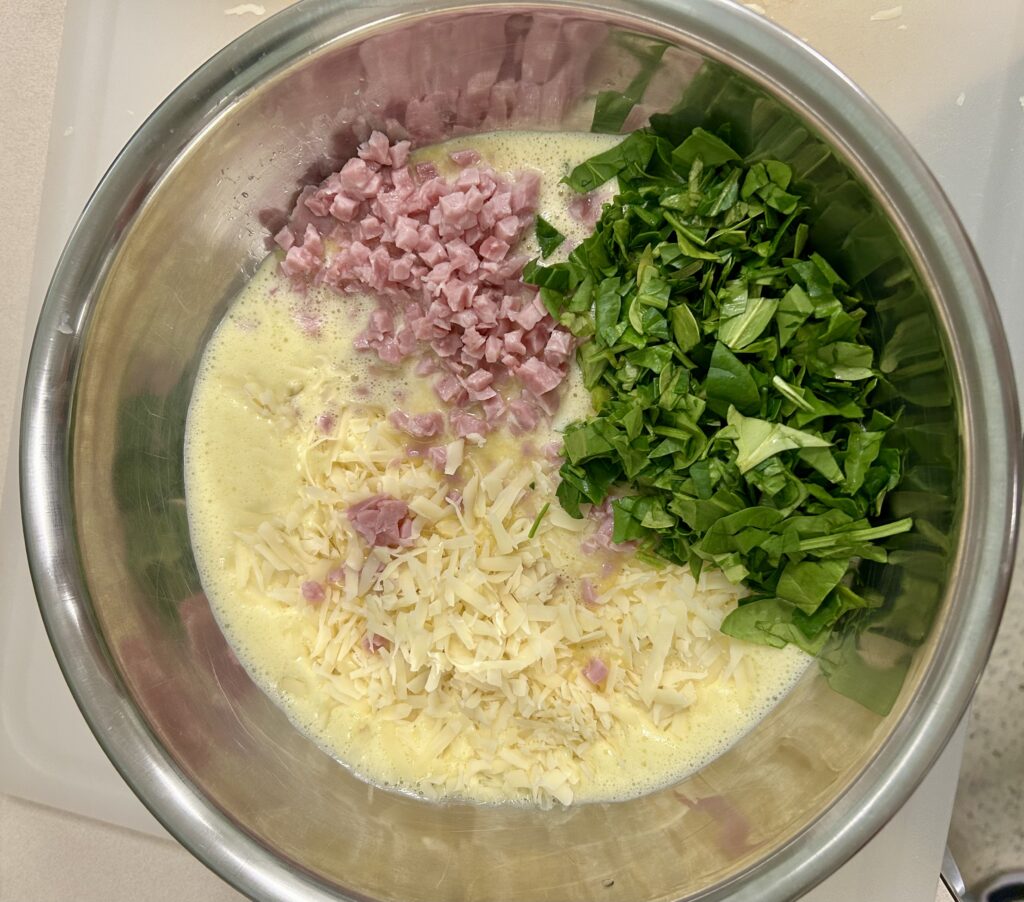
- Preparation (Mise en Place): Preheat your oven to 375* F. Chop/grate the ingredients you will be using. In this picture we grated the Swiss cheese, and chopped the spinach and ham.
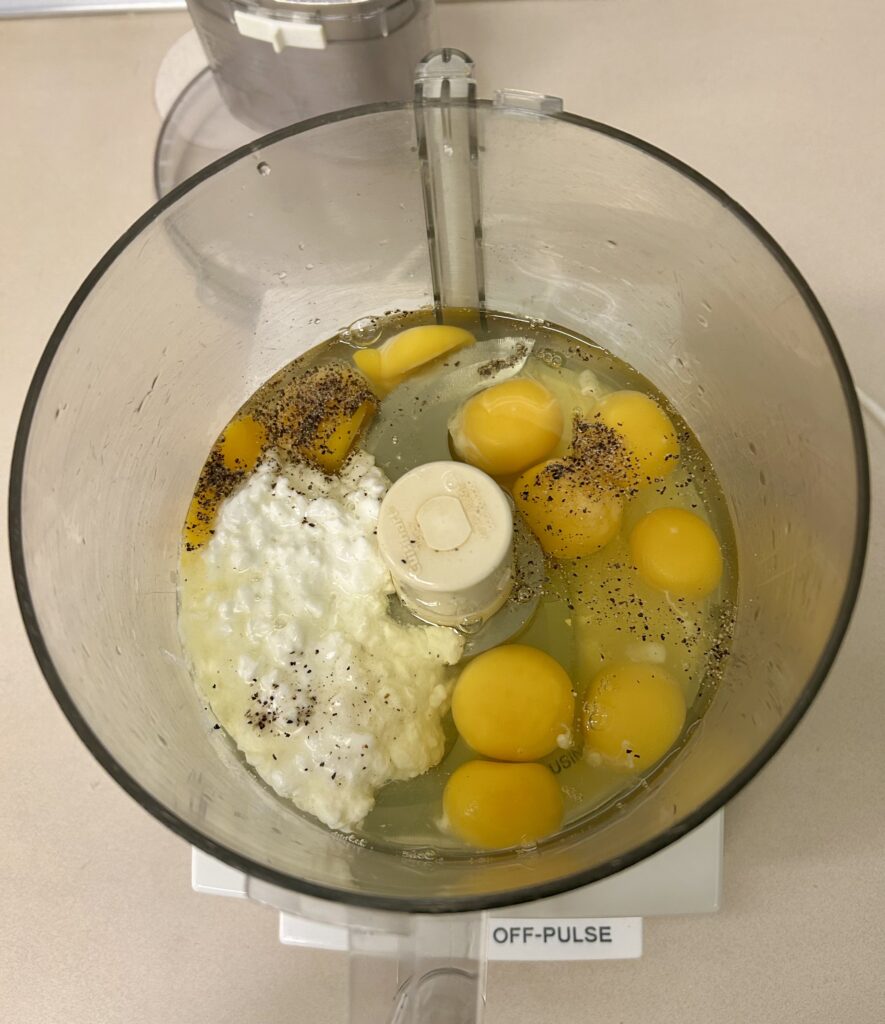
- Once you have finished chopping and grating the ingredients you have chosen for the egg muffins, it is time to measure the ingredients that go into the food processor. This will be the eggs (10), cottage cheese (½ cup), salt (½ tsp), and pepper (¼ tsp). Throw these ingredients into the food processor and begin blending until smooth. You don’t want any chunks from the cottage cheese left in the mixture.
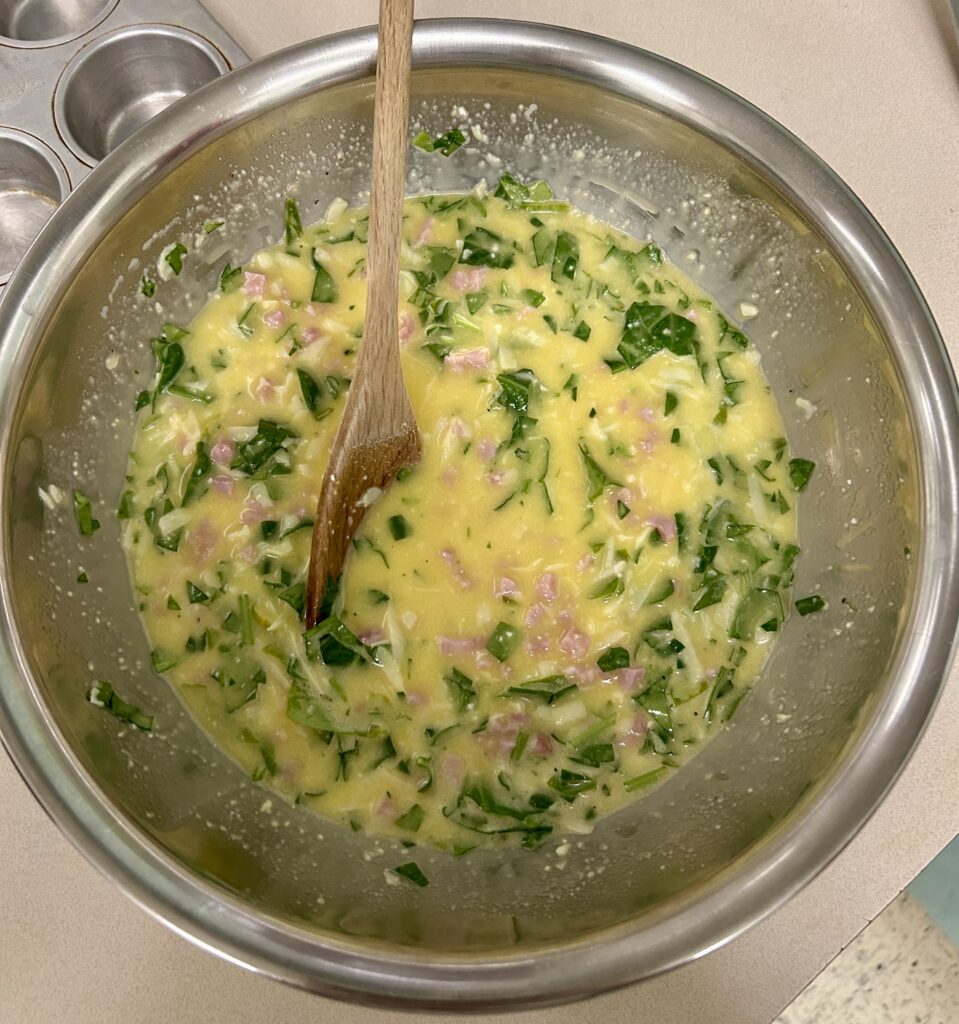
- Once the mixture is smooth, pour it into a different bowl and add in the ham (1 cup), Swiss cheese (½ cup), and Spinach (½ cup). Mix these ingredients gently by stirring with a spoon. (See how to do this down below in the video) Once all mixed in, generously spray or coat muffin tin with oil. If you don’t have a muffin tin, you could also put the mixture into a baking pan. Another option would be to use cupcake liners to minimize sticking. Below is a video showing you how:
- The egg mixture will rise in the oven, so only each one ¾ full. Put the pan in the oven for about 18 minutes, or until they are no longer wet in the middle and golden brown on the top and edge.
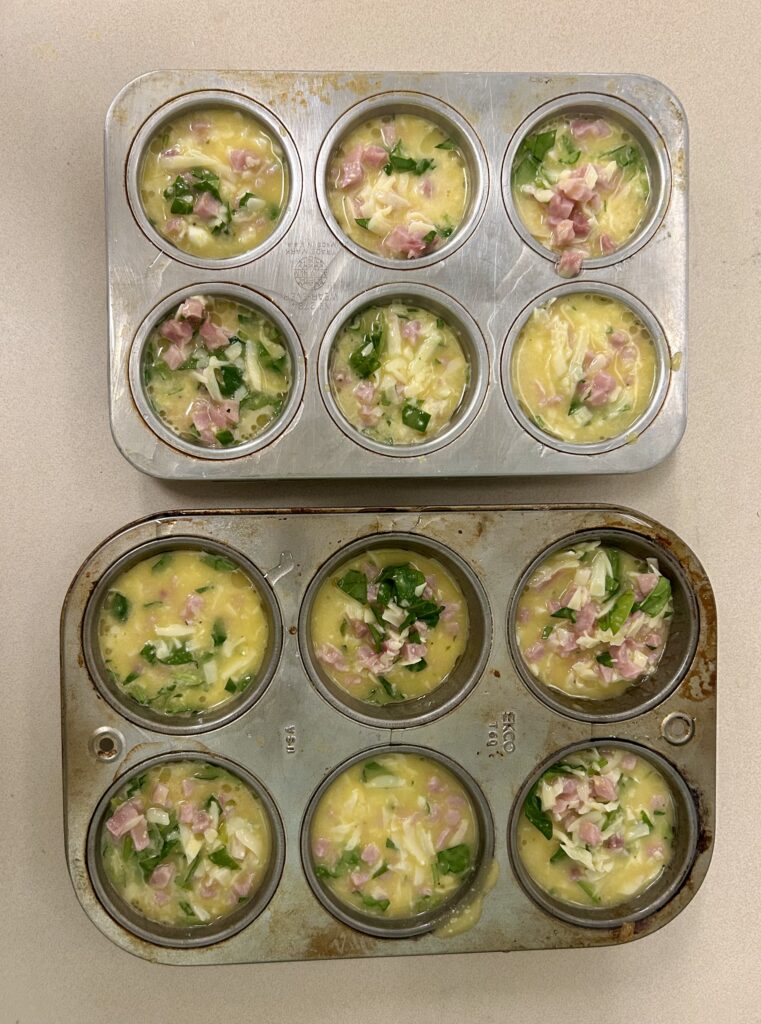
- When you remove the egg muffins from the oven, they will puff up but naturally deflate as they cool—this is completely normal. Once they have fully cooled, they are ready to enjoy!
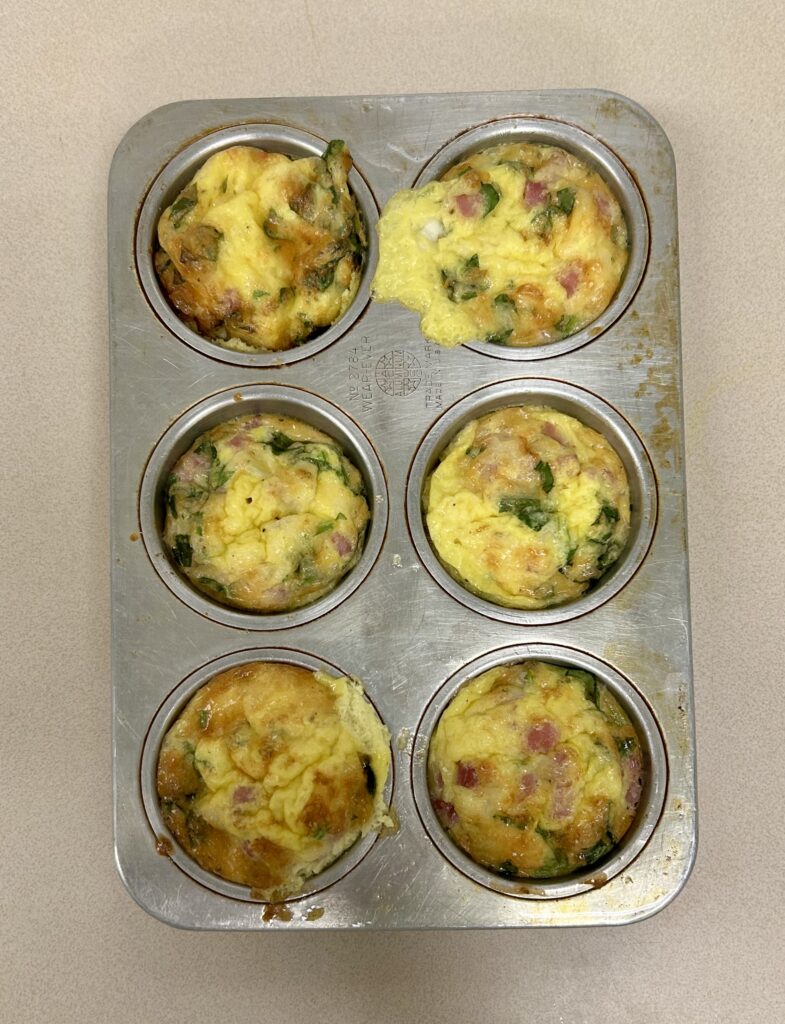
- Here’s a helpful tip: If you plan to freeze or refrigerate the egg muffins, slightly undercook them. They should be fully set in the middle but not golden brown on the outside. This prevents them from overcooking and developing an unpleasant texture when reheated in the microwave.
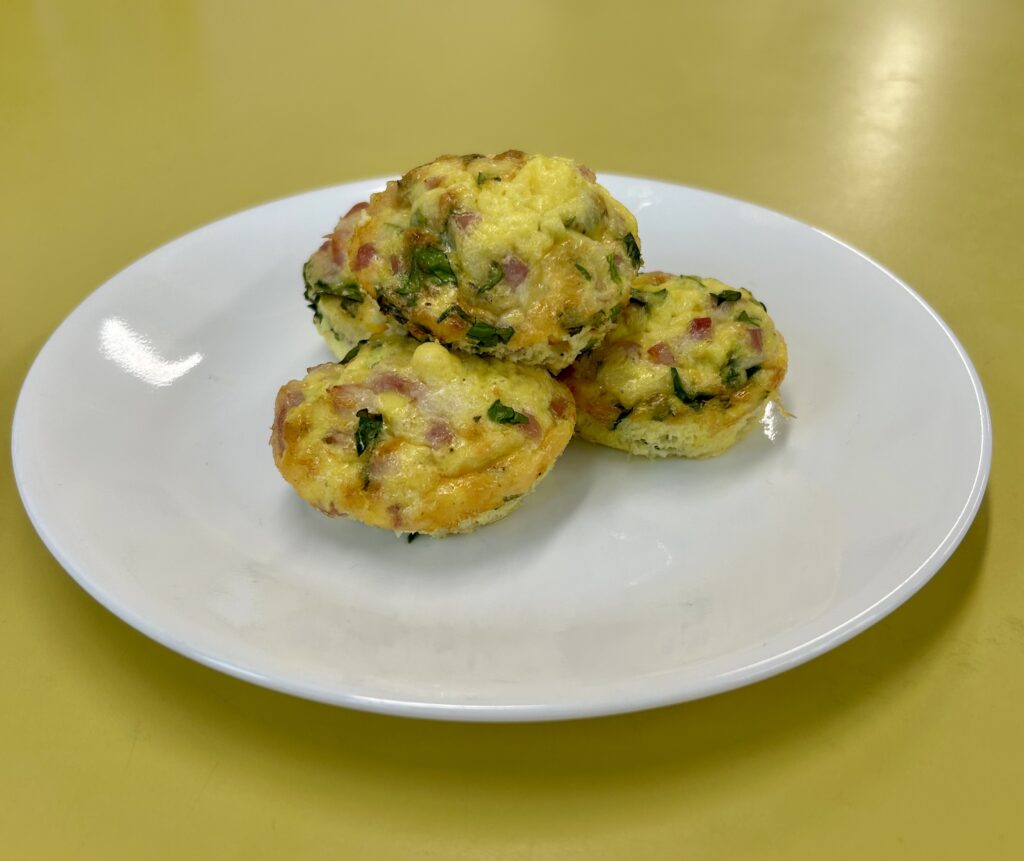
Breakfast Egg Muffins
Description
Breakfast egg muffins offer super easy meal prep for someone on a tight budget. These are quick, easy, and perfect for an on-the-go breakfast!
Ingredients
Instructions
- Preheat the oven to 375ºF. Finely chop or shred your chosen add-in ingredients. Add 2 Tbsp of add-ins to each well of a non-stick 12 muffin tin. If your non-stick pan is older or the finish is a bit worn, you may want to grease the wells first with butter or oil.
- Add the eggs, cottage cheese, salt, and pepper to a large blender. Purée for about 30 seconds or until smooth. With a spoon, stir in shredded Swiss cheese, chopped ham, and chopped spinach.
- Spray the muffin tin with non-stick spray. Pour the egg mixture into the wells of the muffin tin, dividing evenly between each well. It should fill them almost to the top.
- Bake the egg muffins in the preheated oven for 18 minutes, or just until the centers no longer look wet, and they are barely golden around the edges. Avoid overcooking them or they’ll become spongy. They’ll puff up quite a bit as they bake and deflate as they cool. This is normal.
- Allow the muffins to cool in the muffin tin just enough to handle, then loosen them gently with a knife and remove them from the tin. Allow the egg muffins to finish cooling on a wire rack. Enjoy warm or refrigerate until ready to eat.
Cost Breakdown
| Ingredient | Amount Needed | Unit Cost of Ingredient | Recipe Ingredient Cost |
| Chicken Tenders | 1 1/4 Lbs | $3.94/lb | $4.93 |
| Yellow Onion | 1 medium | $1.08/lb | $0.86 |
| Red Bell Pepper | 1 medium | $1.48 | $1.48 |
| Green Bell Pepper | 1 medium | $0.72 | $0.72 |
| Black Beans | 1 (15oz) can | $0.86 | $0.86 |
| Chili Powder | 2 tsp | $0.37/oz | $0.06 |
| Cumin | 2 tsp | $0.51/oz | $0.08 |
| Salt | 3/4 tsp | $0.25/oz | – |
| Garlic | 1/2 tsp | $0.32/oz | $0.01 |
| Smoked Paprika | 1/2 tsp | $0.99/oz | $0.04 |
| Pepper | 1/4 tsp | $1.04/oz | $0.02 |
| Olive Oil | 2 tbsp | $0.39/oz | $0.20 |
| Total Recipe Cost | $9.26 | ||
| Cost Per Serving | $2.32 |
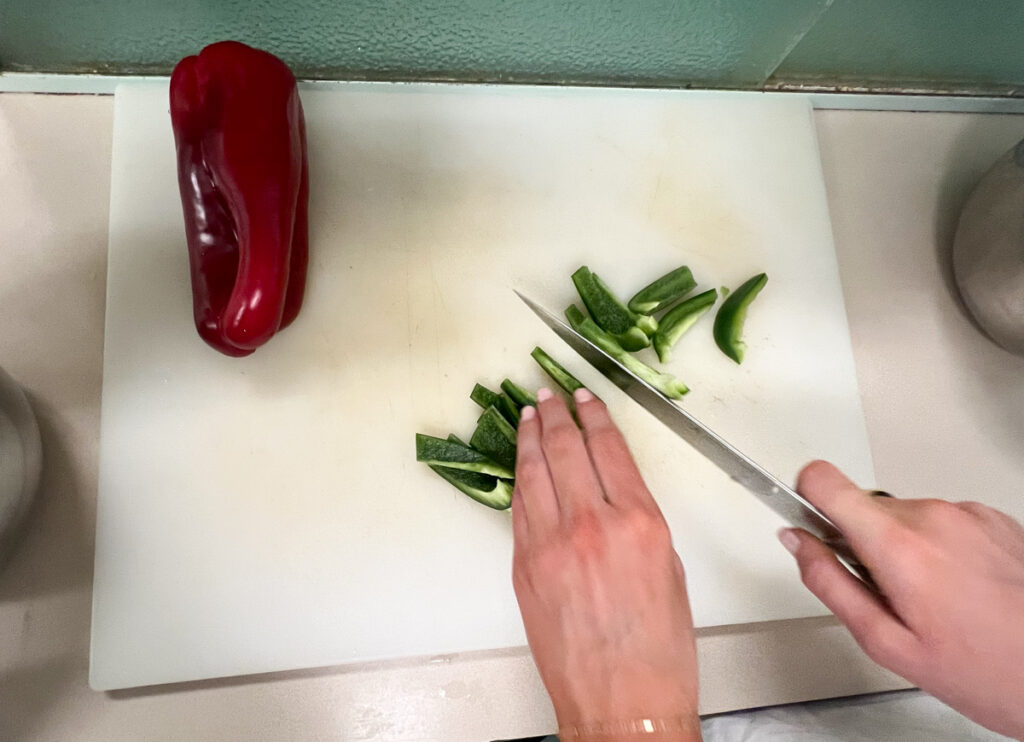
We were surprised at how simple and fun this recipe is to make! It takes little time and preparation, so it is perfect for a busy college student. This recipe will teach you many food skills such as how to safely cook chicken tenders with the cooking method of roasting. To properly roast the chicken, you can heat the baking sheet in the oven first and then place the chicken on the hot pan to cook for 15 minutes in the oven. Test the temperature with a thermometer to make sure the chicken is done and safe to eat.
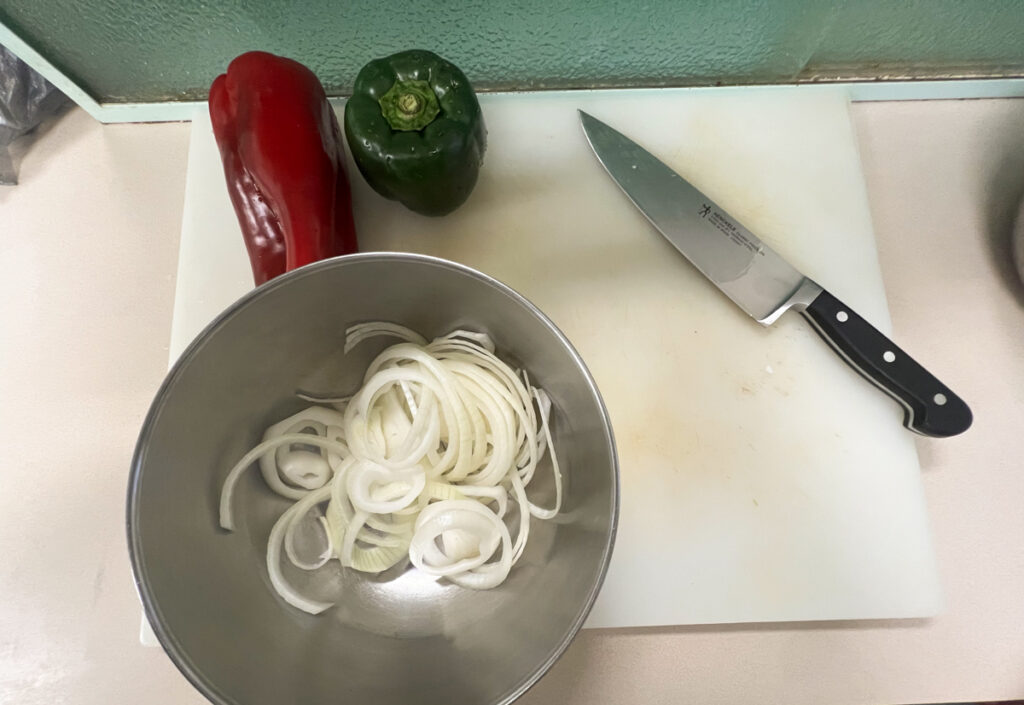
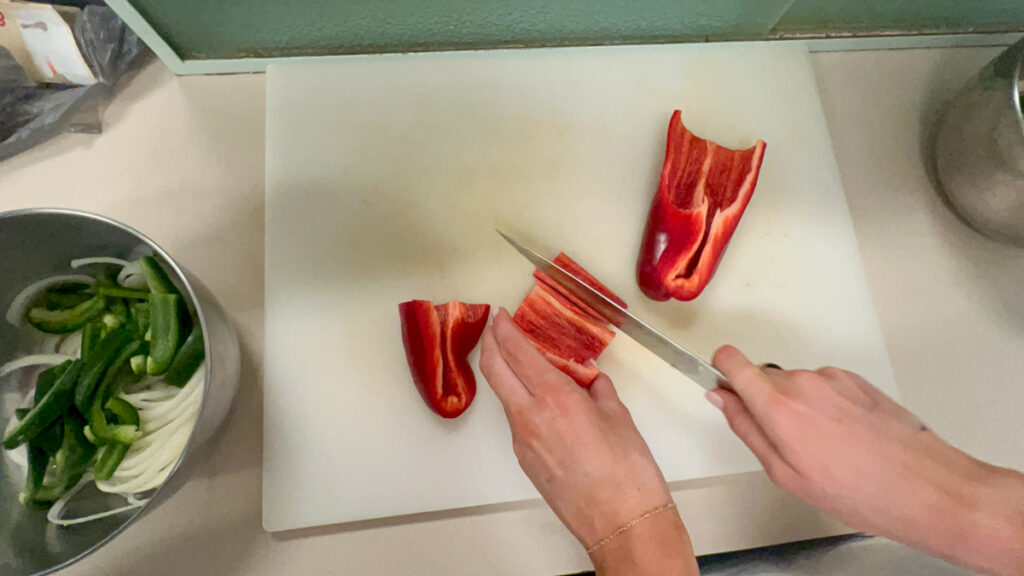
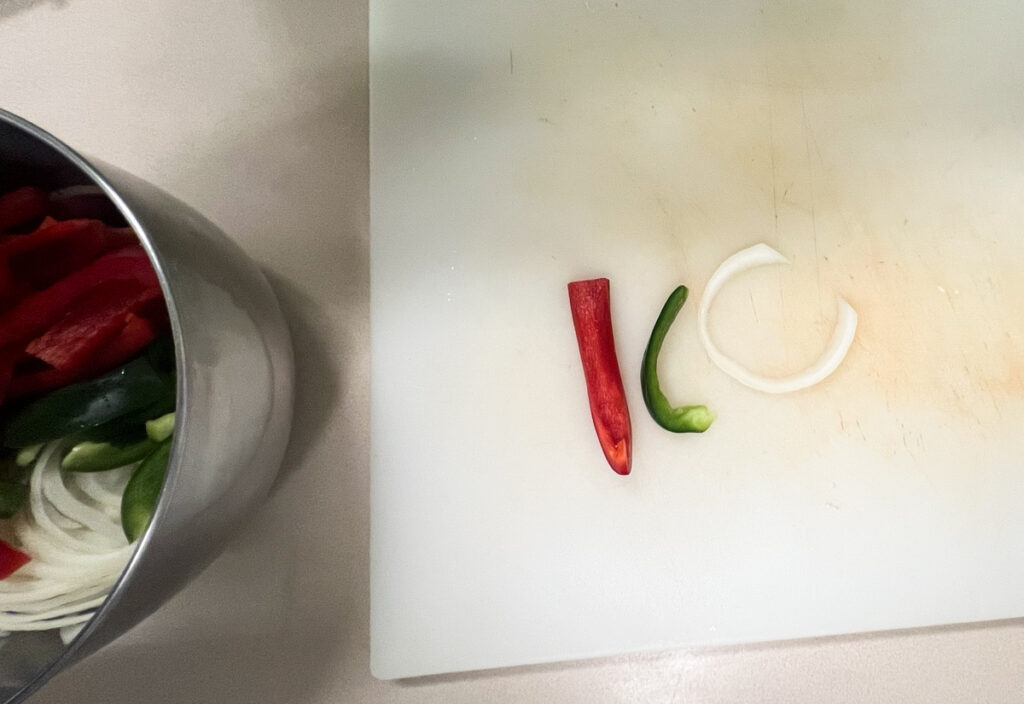
We recommend making this in the summer or fall because that is when the produce is the best, but it works well at any time of year! To make this recipe more cost friendly you can buy generic brands of the chicken, beans, or the yogurt. You can also not add the yogurt dressing, or the kale for a cheaper outcome that will still be delicious! Worried about the cost of the chicken? It most likely won’t all be used for this recipe, so you can freeze the rest and use it for another meal! One tip we have is to cut up the vegetables before beginning the cooking process so everything goes smoothly. We will show you some knife skills to use to cut the onion and peppers nice and even in the pictures below.
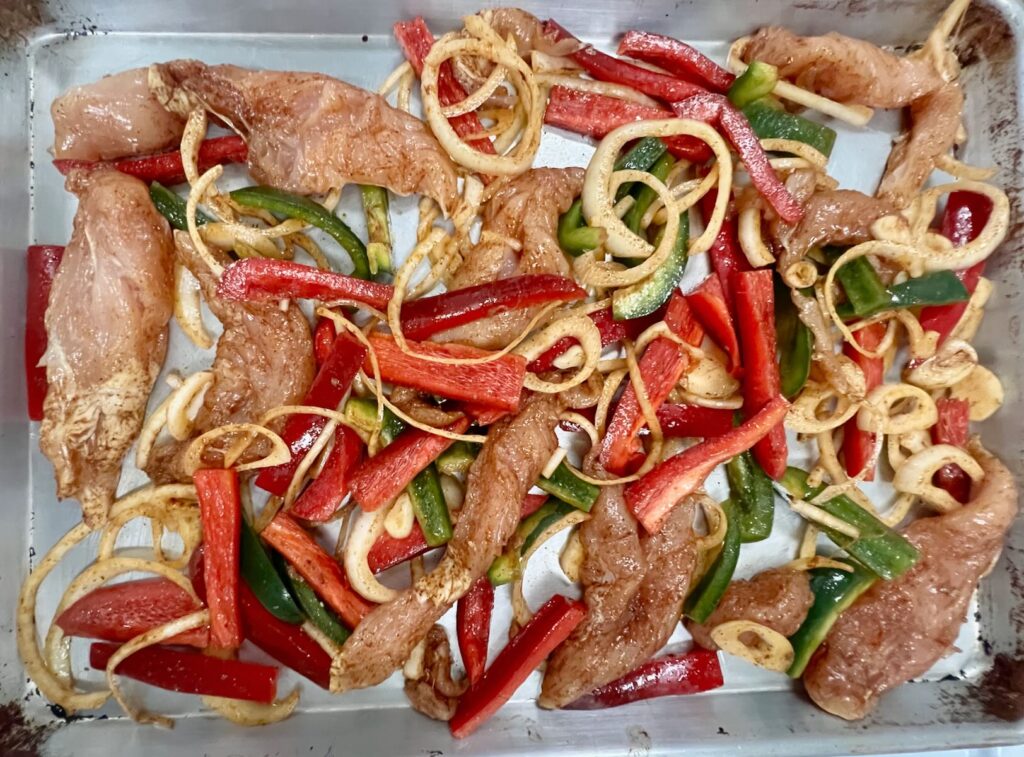
A lot of the ingredients will be cooked in the same pan, which makes it a simple recipe to follow, and fewer dishes to be done. This is also a very healthy and balanced meal with carbs, healthy fats, and protein. It is only 343 calories and a great source of protein (43g)! The finished product should look like a bowl full of veggies and chicken, seasoned to your liking. We think it tastes as delicious as it looks. We hope you enjoy making this recipe as much as we have!
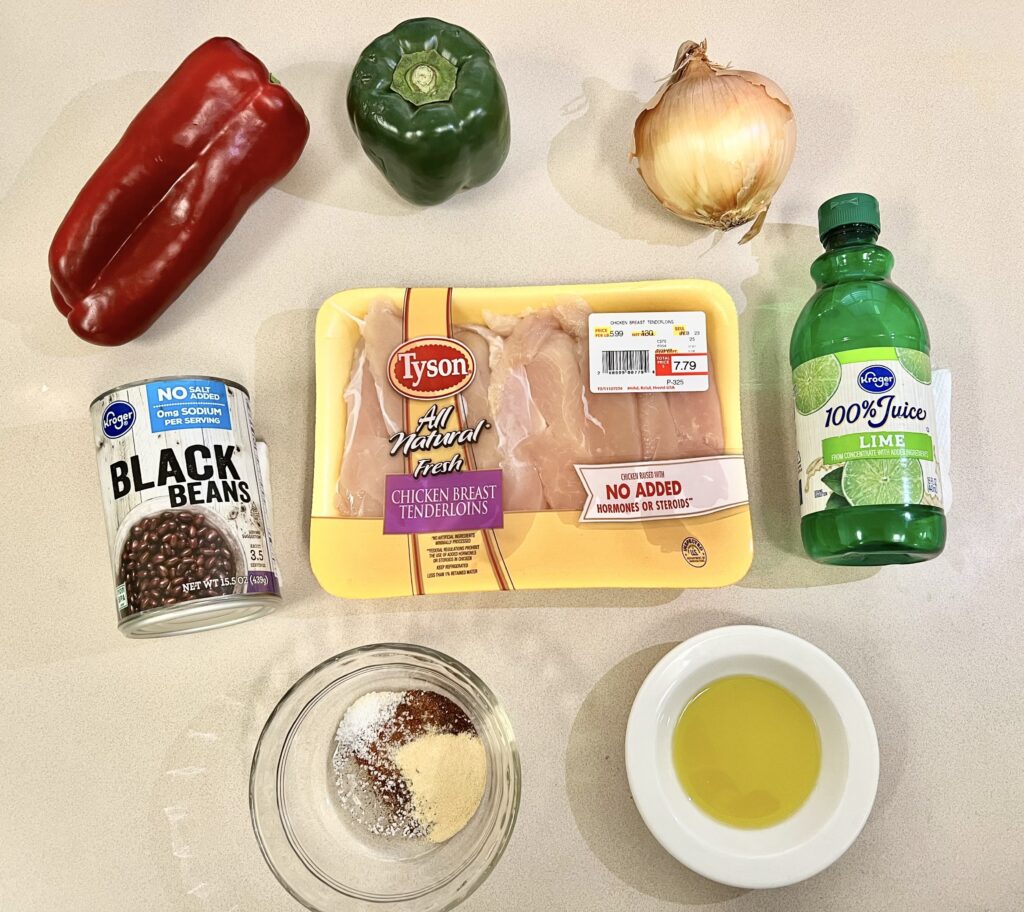
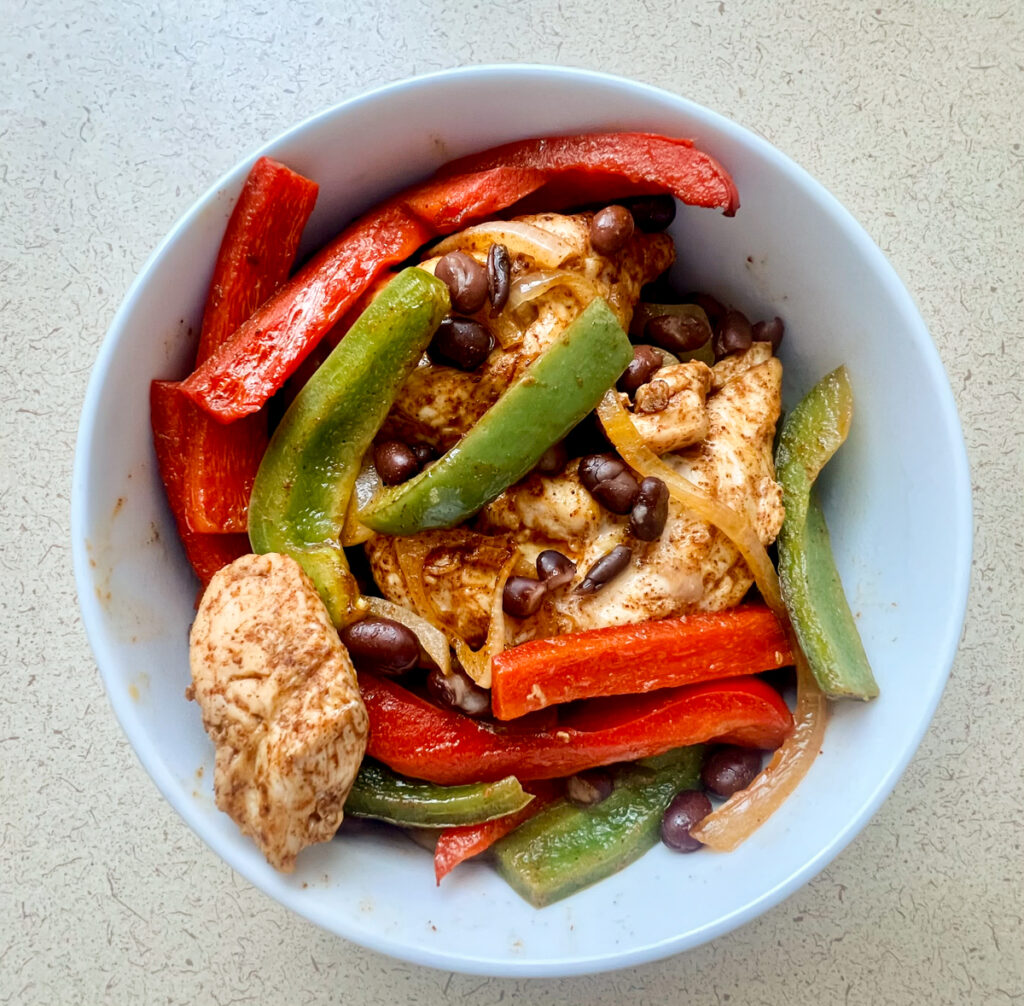

Chicken Fajita Bowls
Description
Chicken sheet pan fajitas are a delicious and easy one-pan meal! It incorporates healthy fats, protein, and carbs to satisfy your hunger and fuel your body. A lighter but filling take on a classic fajita.
Ingredients
Instructions
- Place a large rimmed baking sheet in the oven; preheat to 425 degrees F.
- Remove tendons from chicken and place in a bowl.
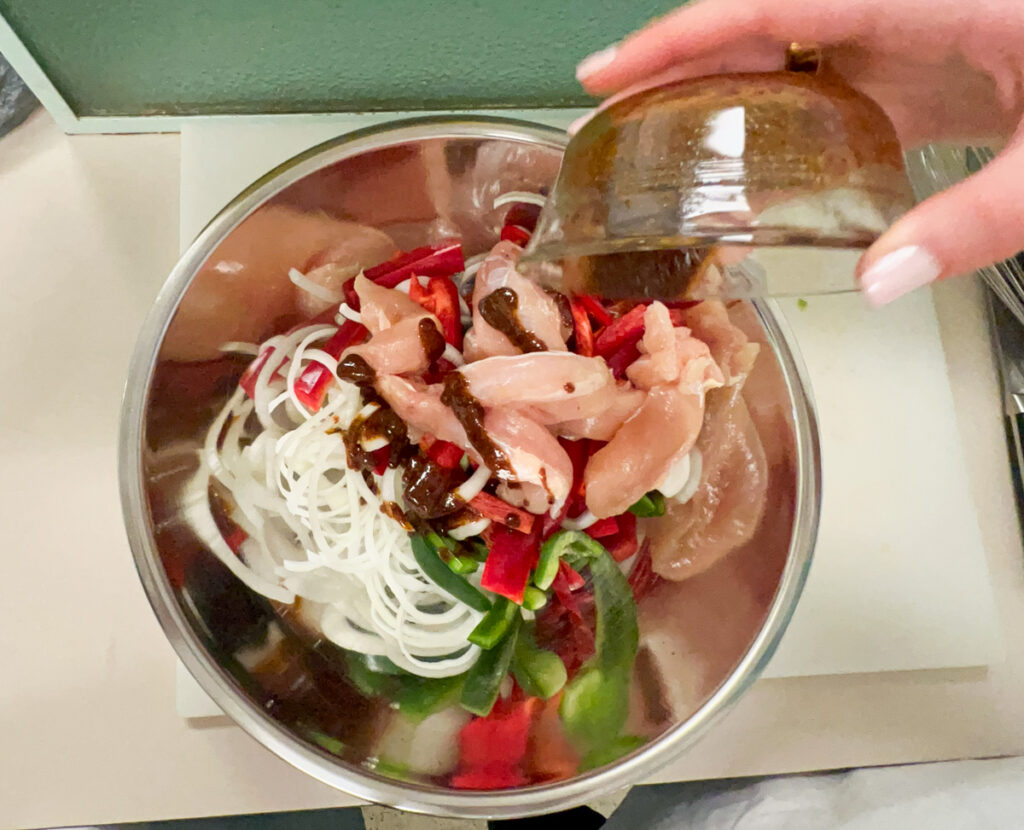
- Combine 2 teaspoons chili powder, 2 teaspoons cumin, 1/2 tsp. salt, ½ teaspoon garlic powder, ½ teaspoon paprika, and ¼ teaspoon ground pepper in a large bowl. Transfer 1 teaspoon of the spice mixture to a medium bowl and set aside. Whisk 1 tablespoon oil into the remaining spice mixture in the large bowl. Add 1 ¼ pounds chicken, 1 medium onion, and 1 red and 1 green bell peppers; toss to coat.
- Remove the pan from the oven; coat with cooking spray. Spread the chicken mixture in an even layer on the pan. Roast for 15 minutes.
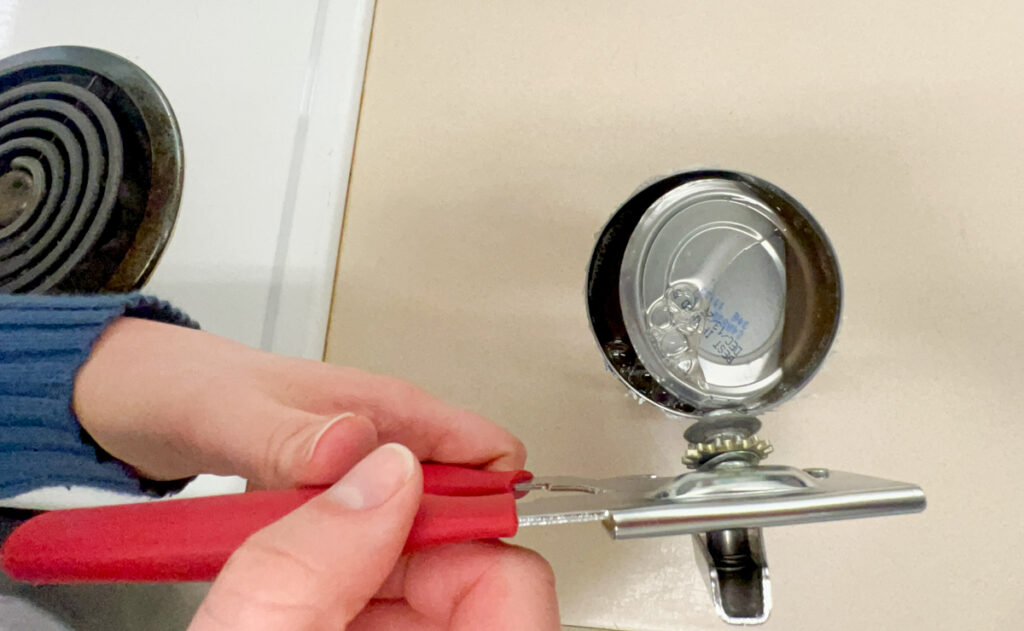
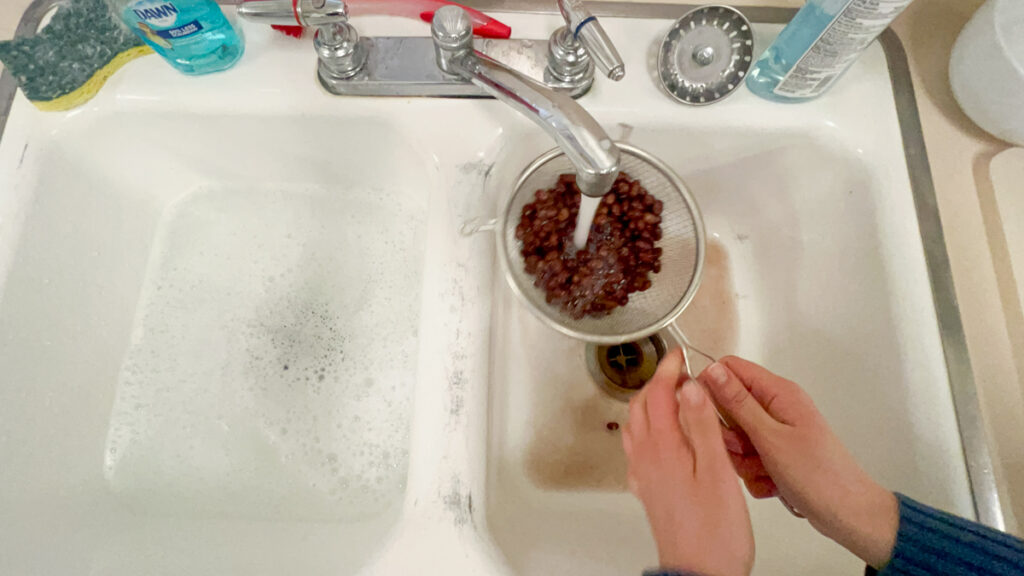
- Meanwhile, rinsed black beans until water runs clear.
- Remove the pan from the oven. Stir the chicken and vegetables. Spread beans evenly over the top. Roast until the chicken is cooked through and the vegetables are tender, 5 to 7 minutes more.
- Divide the chicken and vegetable mixture among 4 bowls.
Video
Notes
- -Preheat pan in the oven first, helps give a good crust to the chicken
- -After 15 minutes of cooking, be sure to add beans
- -Mix the oil and the seasonings for an even coating
- -Recommendations to serve with: rice, kale or lettuce as a salad, or tortilla chips
Cost Breakdown
| Ingredient | Amount Needed | Unit Cost of Ingredient | Recipe Ingredient Cost |
| Large Red Onion | 1/2 | $0.91/ onion | $0.46 |
| Whole Chipotle In Adobo Sauce | 1-2 | $1.63/ 7 oz can | $0.24 |
| Garlic Cloves | 4 | $0.60/ bulb | $0.24 |
| 15 oz Can Black Beans | 2 cans | $1.28/ can | $2.56 |
| Plain Bread Crumbs | 1 cup | $1.22/ 15 oz can | $0.65 |
| Ground Cumin | 1 1/2 tsp | $1/28/ 2.5 oz | $0.13 |
| Salt | 3/4 tsp | $3.12/ 26 oz | $0.13 |
| Black Pepper | 1/2 tsp | $3.12/ 3 oz | $0.09 |
| Eggs | 2 | $5.97/ 12 | $1.00 |
| Buns | 12 | $1.46/ 8 | $2.19 |
| Ketchup | 12 tsp | $2.97/ 20 oz | $0.01 |
| Mustard | $2.54/ 20 oz | $0.01 | |
| Total Recipe Cost | $26.10 | $7.71 | |
| Cost Per Serving | $2.18 | $0.65 |
Recipe Making Process
Step 1:
Gather all your ingredients as seen in the image below. Once all ingredients are gathered, measure out what you need and chop the onion. Gathering and preparing all your ingredients is called mise en place and it will make your cooking process smooth and efficient.
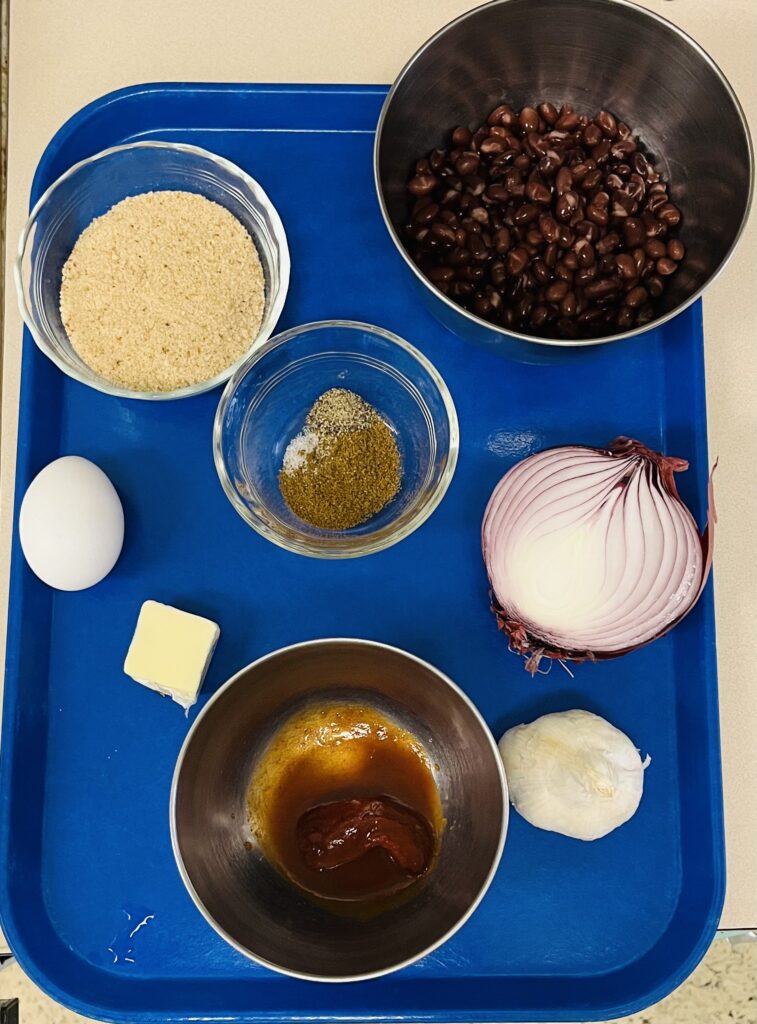
Image Disclaimer: The ingredients shown are equivalent to the recipe halved.
Chopping an onion can be a fairly easy process. Start by slicing off the top of the onion. Then, cut the onion in half lengthwise and remove the outer skin. Next, you will make horizontal cuts into the half onion. You can then start your vertical cuts. If you need more help on chopping an onion this video is a great resource! Cut until you reach the root of the onion and then set aside your chopped onion. The whole onion half can be used as a topping if desired. Now, roll up your sleeves cause it is time to cook!
To start, use either a food processor or a knife and cutting board. If you are low on funds and don’t have access to a food processor, a knife will do the same thing. With a knife, you will take your chopped onion and mince it. Once the onion is minced, set it aside and do the same to your garlic, chipotle, and beans. Do not mince the beans completely, but rather leave them partially chopped. Leaving the beans partially chopped allows for an interest factor in the texture.
If you do have a food processor in your kitchen, the previous steps become more simple. Add the onion, garlic, and chipotle to the bowl. Pulse until the ingredients are minced. Once the ingredients are minced add in the beans and pulse until the beans are partially chopped.
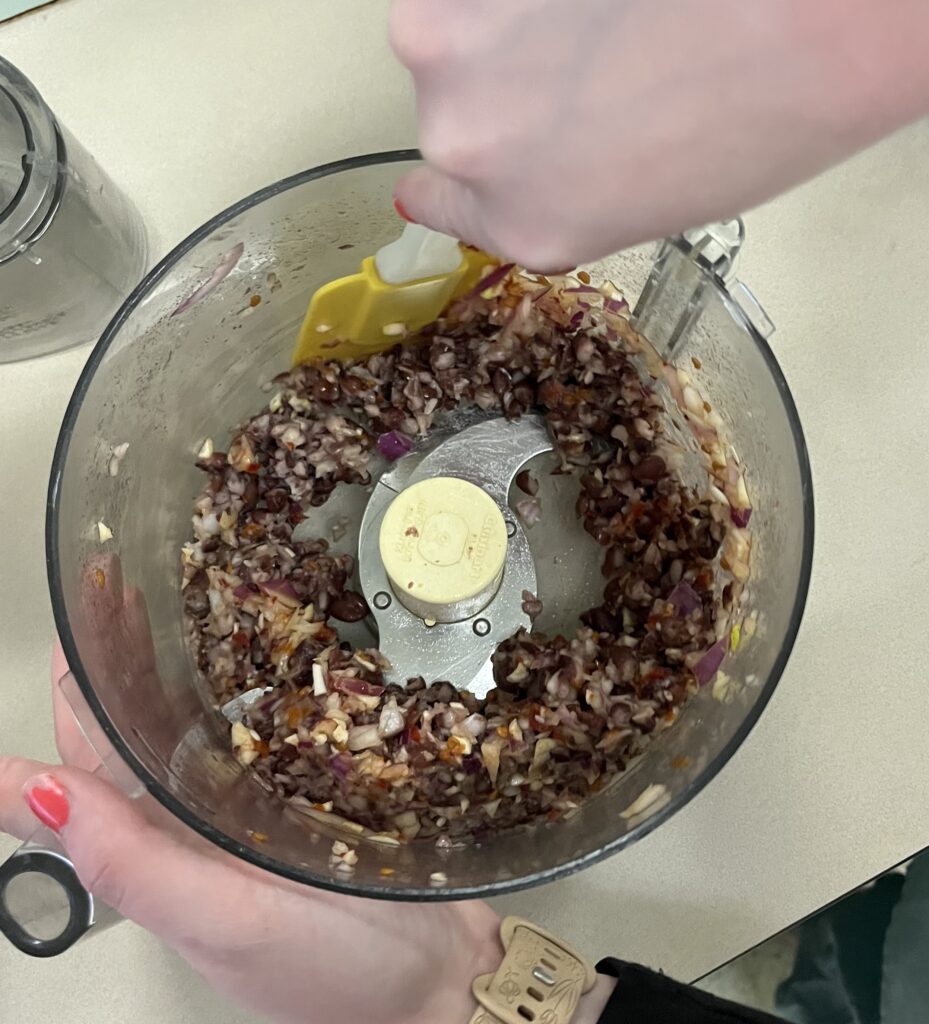
Step 2:
Once you are done chopping or pulsing the ingredients, place them in a large bowl. Add the bread crumbs, seasonings, and egg. Mix all ingredients together until they are well combined. To modify this recipe to be vegan, substitute 1 egg with 1 tablespoon of ground flax seed and 3 tablespoons of warm water. Let the flax seed mixture sit until it achieves a gel-like consistency. Add this to the burger mix.
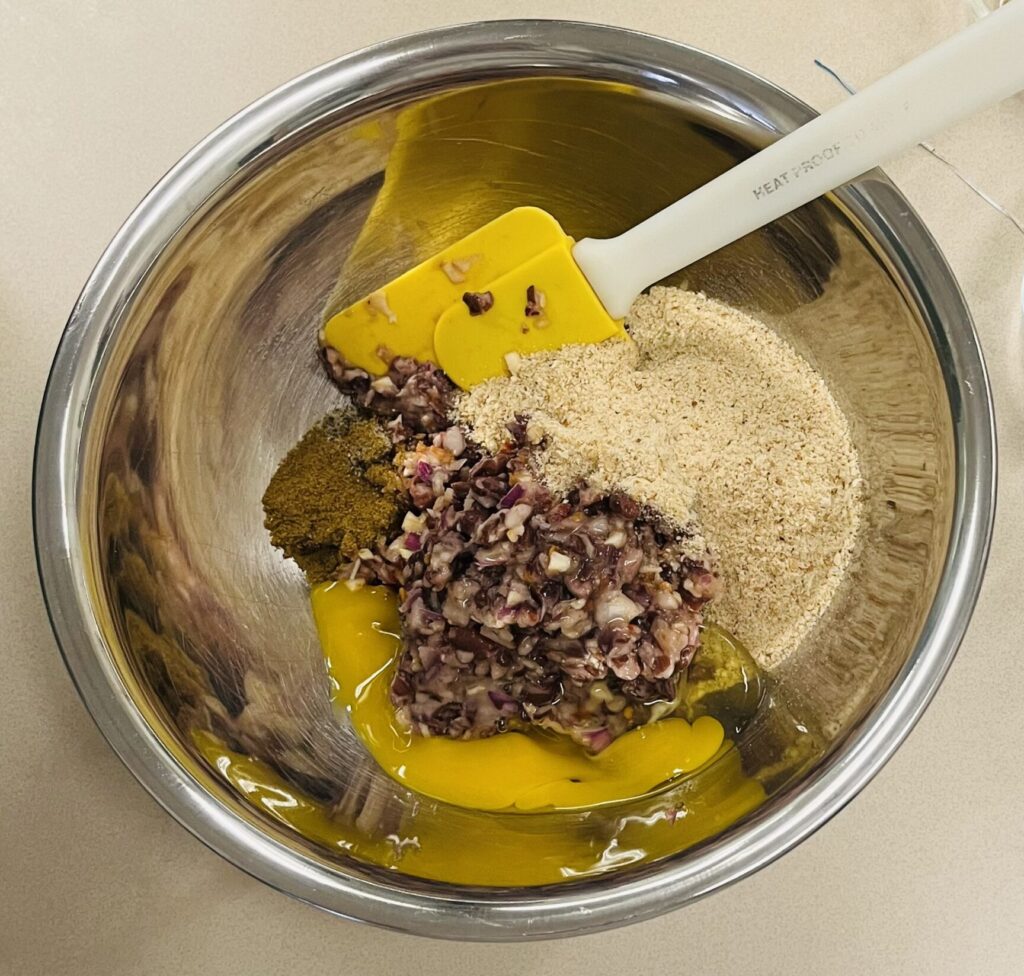
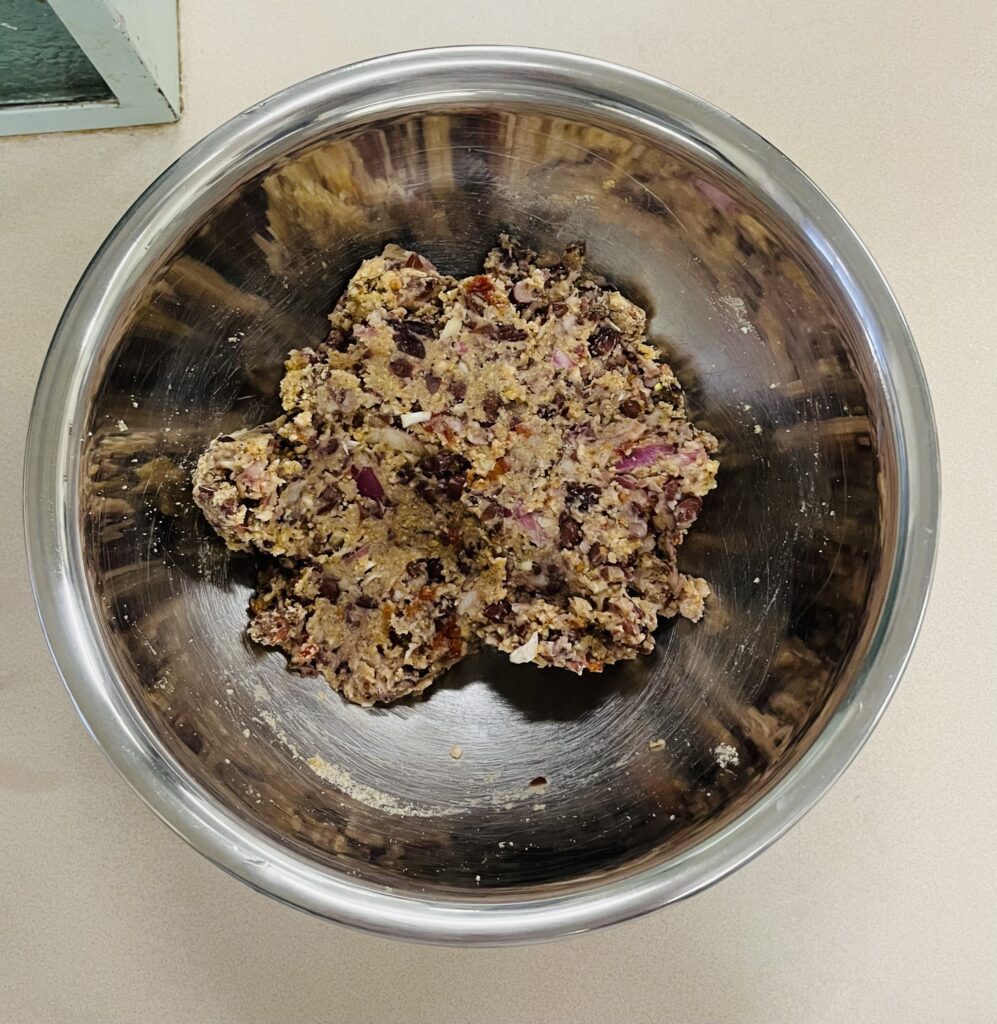
Step 3-4:
Once you have a well combined mixture, take a cookie scoop, or ¼ cup measuring cup and portion out the mixture. You should get around 8-12 patties, but you can make them larger or smaller based on your needs. To cook your patties you can either bake, grill, or pan-cook (sauté) them. All methods are done in a similar manner, so use the method that you feel most comfortable with. For beginner cooks, baking will most likely be easiest. Preheat your oven to 400 degrees F and bake the patties for 5 minutes on each side.
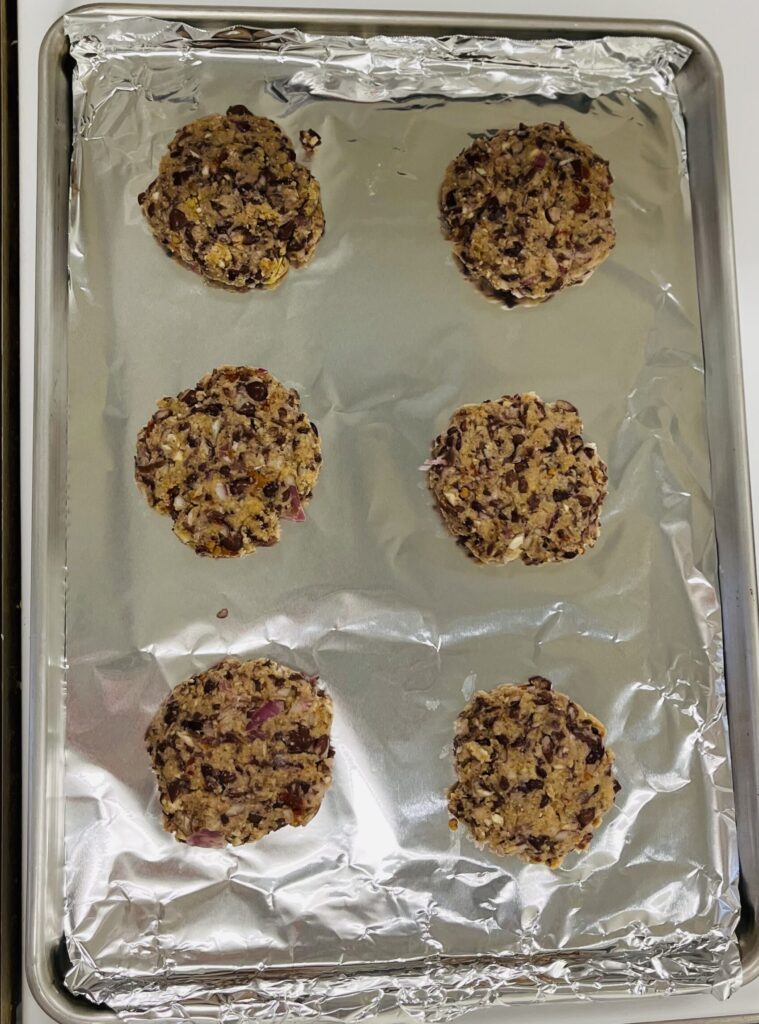
If you desire to grill your burgers, place the burgers down and cook for 5 minutes on each side. This method of cooking adds a different flavor. If you desire to pan-cook or sauté your burgers, warm a lightly oiled pan to medium-high heat. Once again, cook the burgers for 5 minutes on each side. This method provides a nice flavor and the oil helps caramelize the outside of the burgers.
Step 5:
When the burgers are cooked, serve immediately on a bun with your favorite ingredients. This is where you can substitute based on your budget. If it is summertime and the produce is inexpensive, use what you like most. If it is winter and there is less fresh produce, using cheaper produce like bell peppers, avocados, and cucumbers are affordable options. You can also find a cheaper green option like coleslaw mix, which tends to stay under $2 in the winter. In our video the following toppings were used: tomato, lettuce, pickles, sautéed onions, ketchup, mustard, and a lightly toasted bun.
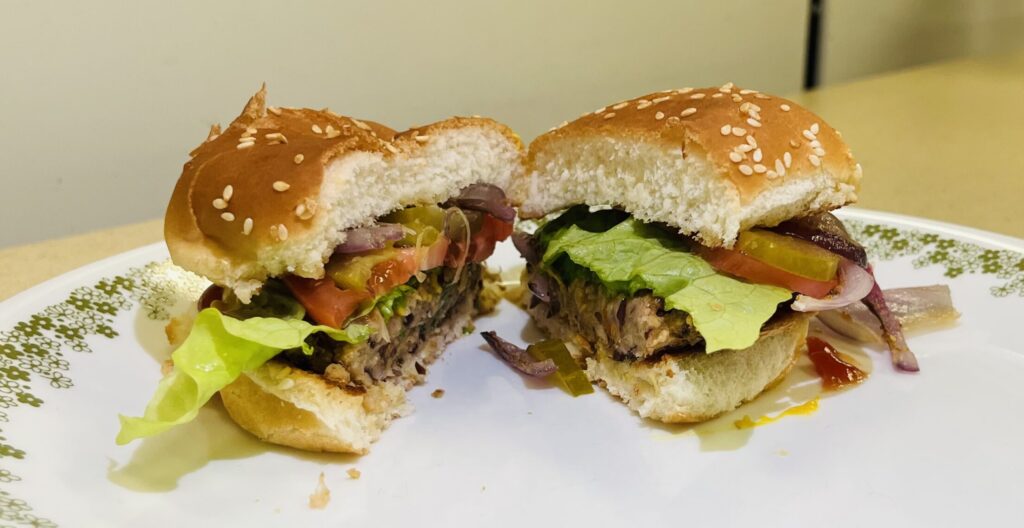
Meal Prep:
This recipe is meal prep friendly. Start by freezing uncooked patties on a parchment paper-lined cookie sheet for 4-6 hours or until frozen solid. They can then be moved to an airtight container or resealable bag. These burgers will last for 2-3 months. When ready to eat, thaw them overnight in the refrigerator or in the microwave (immediate use after this option). Follow the cooking instructions for the desired method and you are ready to enjoy your no-stress burger.
Tips:
The eggs or flax seed mixture are binding agents for the burgers. To keep your burgers together, ensuring the presence of the eggs or flax seed mixture is critical. Having your ingredients minced also contributes to better binding of ingredients. Making sure oil is in the pan or on the grill when sautéing or grilling will also help keep the burgers together. This will also aid in preventing the burger from sticking to the cooking surface and tearing.
Too hot? That is okay because the spice level can be easily changed. The chipotle peppers are optional and can be omitted if this is the case. These burgers give you the freedom to customize your burger to your taste preferences. If you want jalapeños in there, great! If not, great! This recipe provides opportunities to get creative in your culinary skills. Good luck and enjoy!
Nutrient Content:
| Nutrient | Amount |
| Carbohydrates | 29g |
| Protein | 10g |
| Fat | 2g |
| Cholesterol | 40mg |
| Sodium | 291mg |
| Potassium | 379mg |
| Fiber | 8g |
| Sugar | 1g |
| Vitamin A | 75 IU |
| Vitamin C | 1.4mg |
| Calcium | 51mg |
| Iron | 2.7mg |
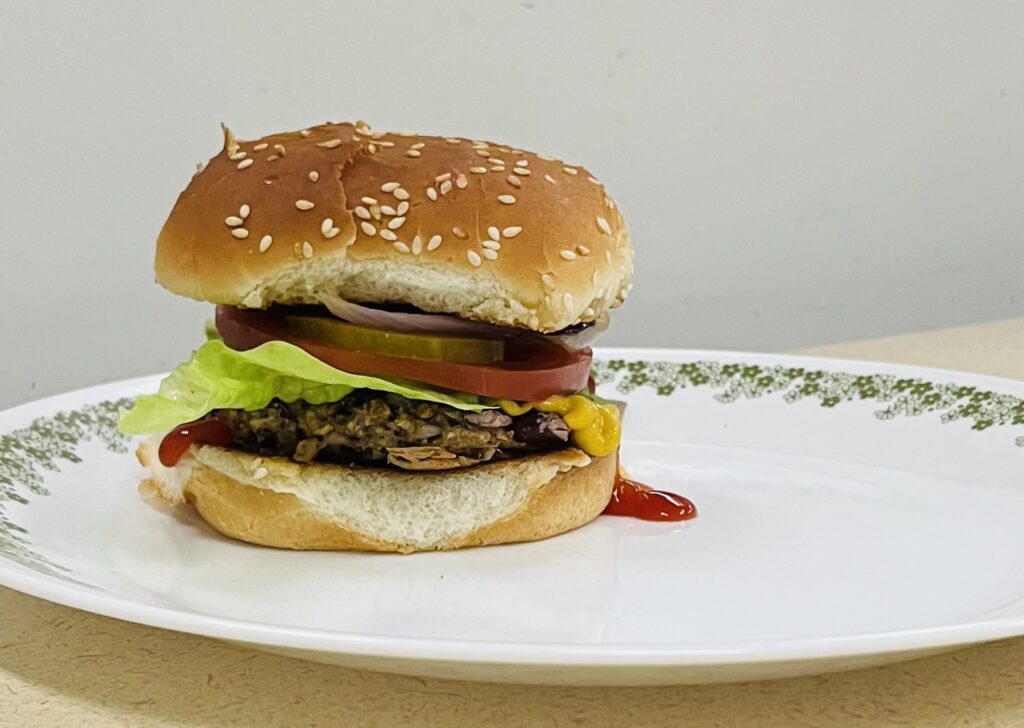
Black Bean Burger
Description
Black Bean Burgers are easy, delicious, and budget-friendly. They make delicious dinners, especially for your vegetarian and vegan friends! This recipe makes meal prepping so easy as well. The Black Bean Burger has been designed to be nutrient-packed, convenient, and easily modifiable to your taste preferences.
Ingredients
Instructions
- Place onion, chipotle, and garlic into a food processor and pulse until finely chopped. Add in black beans and pulse until the black beans are partially chopped, leaving some whole or partial beans. Transfer to a large mixing bowl.
- Stir in the bread crumbs, cumin, salt, pepper and eggs until well combined.
- Divide up the mixture to form 8 to 12 patties
- When ready to cook choose one of the following options:
Skillet: heat a lightly oiled skillet to medium high heat. Cook for 5 minutes on each side.
Baked: Bake in a 400 degree oven for 5 minutes each side.
Grilled: Cook on an outdoor grill for 5 minutes each side. - Serve hot on a bun with desired toppings.
Video
Notes
- Look ahead and choose your desired cooking method before starting. If you choose baking, preheat your oven to 400F first.
Cost Breakdown
| Ingredients | Amount Needed | Unit Cost of Ingredient | Recipe Ingredient Cost |
| Chicken Breast | 8 Breast Halves | $12.18(2.67/lb) | ~$1.52/Breast |
| Salt and Pepper | ——- | ——- | ——- |
| Eggs | 4 Large Eggs | $3.42/6-Pack | $0.57/egg |
| Panko Bread Crumbs | 2 c. | $1.87/2 c. | ~$0.94/c. |
| Parmesan Cheese | 1.5 c. | $5.42/2.5 c. | $2.17/c. |
| All-Purpose Flour | 4 Tbsp. | $2.64/2 lbs. | ~$0.02/Tbsp. |
| Olive Oil | 1 c. 4 tsp. | $10.88/25.5 fl. Oz. | $3.41/c. |
| Tomato Sauce | 1 c. | Separate | Separate |
| Fresh Mozzarella | 0.5 c. | $3.98/12 oz. | ~$0.66 |
| Chopped Basil | 0.5 c. | $1.78/0.5 oz. | $3.56 |
| Grated Provolone | 1 c. | $3.78/16 oz. | $0.95 |
| Total Cost | $56.83 | $29.36 | |
| Cost per Serving | $3.68 |
Recipe Making Process
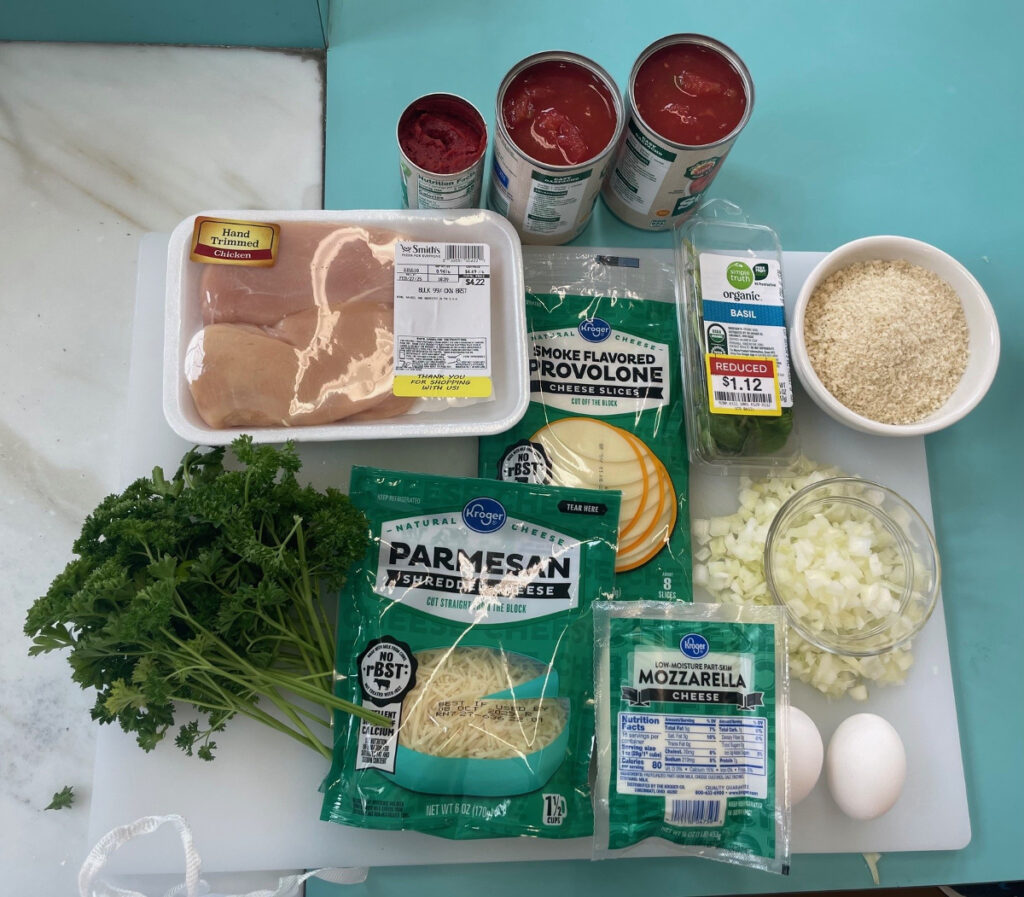
- Preheat oven to 450 degrees F
- Place chicken breasts between two sheets of heavy plastic (Resealable freezer bags work well) on a solid, level surface. Firmly pound chicken with the smooth side of a meat mallet to a thickness of 1/2-inch.
- Season chicken thoroughly with salt and pepper. Dredge chicken in flour using a sifter or strainer, evenly coating both sides.
- Beat eggs in a shallow bowl and set aside. Mix bread crumbs and 1 cup Parmesan cheese in a separate bowl, set aside.
- Dip a flour-coated chicken breast in beaten eggs. Transfer breast to the bread crumb mixture, pressing crumbs into both sides. Repeat for each breast. Let rest for 10 to 15 minutes.
- Heat 1/2 inch olive oil in a large skillet on medium-high heat until it begins to shimmer. Cook chicken in the hot oil until golden, about 2 minutes per side. The chicken will finish cooking in the oven.
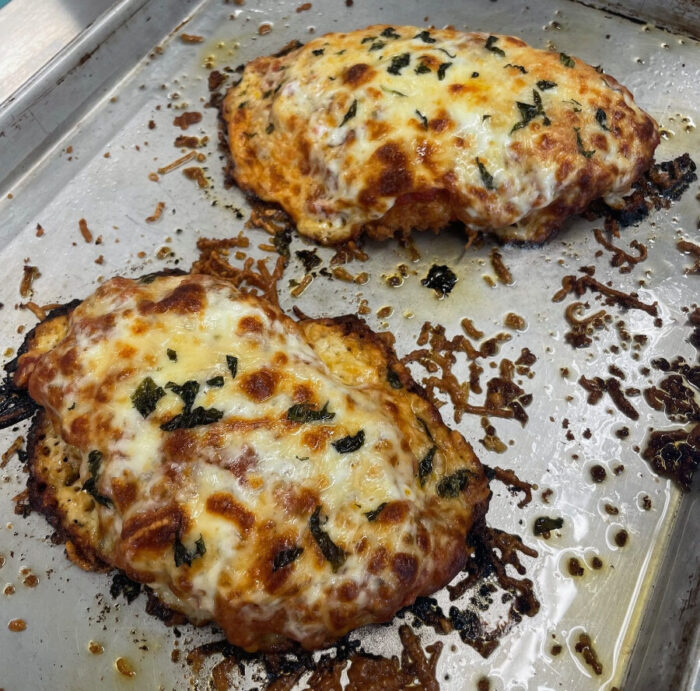
- Transfer chicken to a baking dish. Top each breast with 2 tablespoons tomato sauce. Layer each chicken breast with equal amounts of mozzarella cheese, fresh basil, and provolone cheese. Sprinkle remaining Parmesan over top and drizzle with 1/2 teaspoon olive oil.
- Bake in the preheated oven until cheese is browned, bubbly, and chicken breasts are no longer pink in the center, 15 to 20 minutes. An instant-read thermometer inserted into the center should read at least 165 degrees F (74 degrees C).
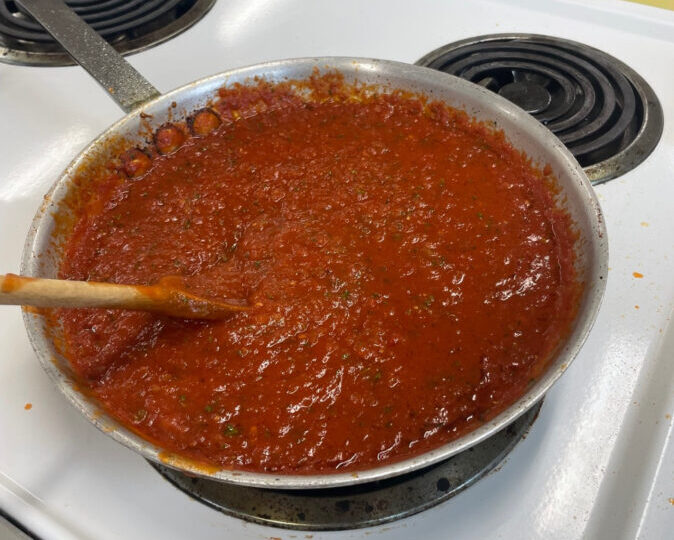
Chicken Parm with Marinara Sauce
Description
A simple and delicious marinara sauce that can be used on anything – from pasta, to pizza, to this delicious chicken parm! And the chicken parm is a breaded chicken breast that is first pan-fried, then topped with the marinara sauce and cheese! Finish this dish by baking in the oven until the cheese is melted!
Ingredients
Best Marinara Sauce
Chicken Parmesan
Instructions
- Place tomatoes, tomato paste, parsley, garlic, oregano, salt, and pepper in a food processor; blend until smooth.
- Heat oil in a large skillet over medium heat. Add onions and cook until slightly softened, about 2 minutes.
- Stir in blended tomato sauce and white wine (or vinegar and grape juice substitute)
- Simmer, stirring occasionally until thickened, about 30 minutes.

- While marinara sauce is simmering, preheat an oven to 450 degrees F.
- Place chicken breasts between two sheets of heavy plastic (resealable freezer bags work well) on a solid, level surface. Firmly pound chicken with the smooth side of a meat mallet to a thickness of 1/2-inch.
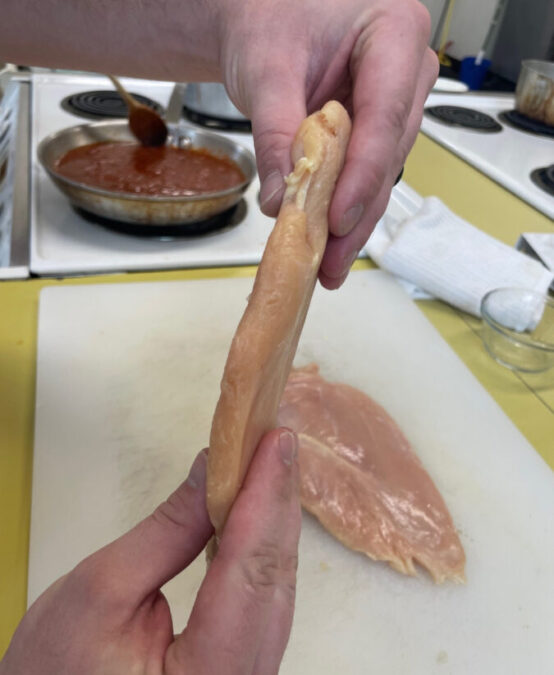
- Season chicken thoroughly with salt and pepper. Dredge chicken in flour using a sifter or strainer; evenly coating both sides.
- Beat eggs in a shallow bowl and set aside. Mix bread crumbs and 1 cup Parmesan cheese in a separate bowl, set aside. Dip a flour-coated chicken breast in beaten eggs. Transfer breast to the bread crumb mixture, pressing crumbs into both sides. Repeat for each breast. Let chicken rest for 10 to 15 minutes.
- Heat 1/2 inch olive oil in a large skillet on medium-high heat until it begins to shimmer. Cook chicken in the hot oil until golden, about 2 minutes per side. The chicken will finish cooking in the oven.
- Transfer chicken to a baking dish. Top each breast with 2 tablespoons tomato sauce. Layer each chicken breast with equal amounts of mozzarella cheese, fresh basil, and provolone cheese. Sprinkle remaining Parmesan over top and drizzle each with 1/2 teaspoon olive oil.
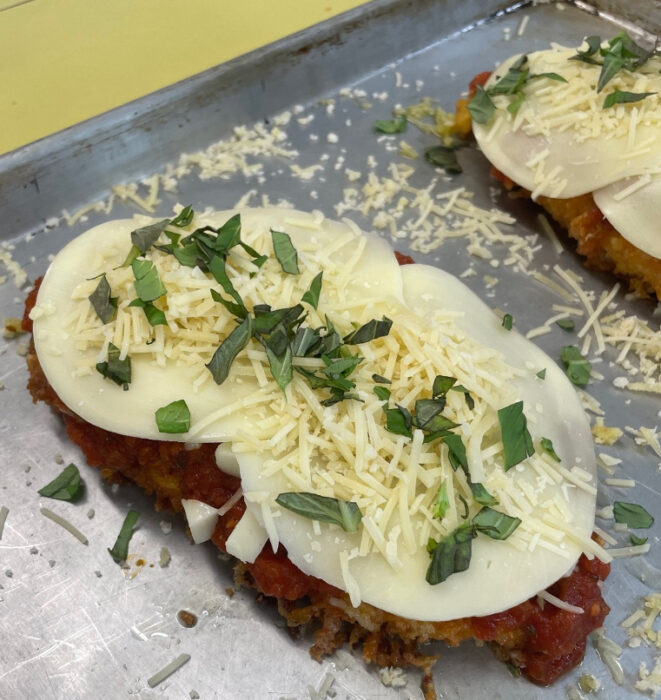
- Bake in the preheated oven until cheese is browned and bubbly and chicken breasts are no longer pink in the center, 15 to 20 minutes. An instant-read thermometer inserted into the center should read at least 165 degrees F (74 degrees C).
Best Marinara Sauce
Chicken Parmesan
But wait!!! Could your dream be a possibility? Could there be a way to turn your regular toasted bread to be a masterpiece of a meal?!
YES and you’ve come to the right place.
A three-course meal! That takes five minutes! And it’s toast!! No fancy equipment needed. This recipe consists of four fresh and gourmet toasts, developed by Lori at the Kitchen Whisper, that will have your mouth exploding with unique flavors. A loaded toast with fruits, veggies, good carbohydrates and proteins, for every course of your meal: appetizer, main dish, and dessert. Your toast craving will be satisfied and your body will be happily fueled with this hearty goodness in no time.
We know, being college students ourselves, what it’s like to have the “hanger monster” roaming around your mind and needing a fast and cheap meal. Toast is not a bad option! We want to take it to the next level! Choose whatever bread you so desire. Because of allergies, we are making it with gluten-free bread, but whole wheat, Asiago cheese, focaccia, or whatever bread you choose would be exceptional too! These recipes are adapted from The Kitchen Whisperer website, and will change the course of your college-student toast life. We are changing the future of toast. You will never go back to PB and J.
Cost Breakdown
Berry Toast
| Ingredient | Amount | Unit Cost of Ingredient | Recipe Cost of Ingredient |
| *BFree White Sourdough Loaf (Gluten Free) | 14.11 oz | $5.98/16oz bag | $1.39 (per slice) $2.77 (per recipe) |
| Ricotta cheese | 1/4 cup | $2.99/15 oz | $0.40 |
| Honey | 2 Tbsp | $3.99/12 oz 1 Tbsp=0.5 oz | $0.33 |
| Vanilla Extract | 1/4 tsp | $1.99/2 fl oz 1 fl oz=6 tsp | $0.33 |
| Strawberries | 2 whole | $3.49/1 lb | $0.35 |
| Raspberries | 8 each | $2.50/6 oz | $0.67 |
| Organic Blueberries | About 10 each | $4.49/6 oz | $0.90 |
| Fresh Mint | 2 leaves | $2.49/2Tbsp | $0.31 |
| Handful of chocolate chips | 2 Tbsp | $3.00/12 oz 1 Tbsp=0.5 oz | $0.25 |
| TOTAL RECIPE COST | $6.31 | ||
| COST PER SERVING (1 SERVING) | $3.16 |
BAE Toast
| Ingredient | Amount | Unit Cost of Ingredient | Recipe Cost of Ingredient |
| Crispy bacon | 1.5 pieces | $4.99/12 oz | $0.63 |
| Avocado | 1/2 medium | $0.99/avocado | $0.50 |
| Hard boiled eggs | 2 | $1.79/12 eggs | $0.30 |
| Black pepper | 1/4 tsp | dash | — |
| Kosher salt | 1/4 tsp | dash | — |
| Red pepper flakes | 1/4 tsp | dash | — |
| Honey | 1 Tbsp | $3.99/12 oz | $0.17 |
| Sriracha | 1 tsp | $3.49/17 oz | $0.03 |
| TOTAL RECIPE COST | $4.40 | ||
| COST PER SERVING (1 SERVING) | $2.20 |
Veggie Curl Toast
| Ingredient | Amount | Unit Cost of Ingredient | Recipe Cost of Ingredient |
| Plain hummus | 1/4 cup | $3.50/10 oz | $1.40 |
| Nonfat Greek yogurt | 3 Tbsp | $6.29/32 oz | $0.29 |
| Zucchini | 1 whole | $0.75 | $0.75 |
| Carrot | 1 whole | $2.49/2 lb | $0.21 |
| Squash | 1 whole | $0.85 | $0.85 |
| Extra virgin olive oil | drizzle | — | — |
| Dried dill, kosher salt, black pepper, red pepper flakes | Pinches of each | — | — |
| TOTAL RECIPE COST | $5.42 | ||
| COST PER SERVING (1 SERVING) | $2.71 |
Caprese Toast
| Ingredient | Amount | Unit Cost of Ingredient | Recipe Cost of Ingredient |
| Avocado | 1 ea | $0.99 | $0.99 |
| Mini mozzarella balls | 8 ea | $5.99/8 oz | $3.00 |
| Grape tomatoes | 8 each, halved | $2.79/10 oz | $1.12 |
| Olive oil | drizzled | — | — |
| Basil | 1 Tbsp | $3.49/0.5 oz | $3.49 |
| Oregano | 1 Tbsp | $1.25/0.63 oz | $1.00 |
| Salt and pepper | 1 Tbsp, each | — | — |
| TOTAL RECIPE COST | $12.37 | ||
| COST PER SERVING (1 SERVING) | $6.19 |
Recipe Making Process
Okay, you’ve got your grocery list… Where to next? Where’s the best place to shop? What’s great is you are a student in college, so there are resources for you! If you are attending Utah State University you have access to the SNAC food pantry which can get you a bag of food free each week, no questions asked. The hard part is you do not always have control over what they give you. But many times there is a good loaf of bread, and if it is in season, you can get some good veggies. If not, the next best option is a relatively inexpensive grocery store near you. We shopped at Smith’s for quality and price, however Walmart and WinCo are also good options.
Zucchini and squash and tomatoes and berries are great and easy to find during the summer and early fall months, but what about those long winter months? Try substituting berries for orange slices or pomegranate seeds. There are canned tomatoes that can be substituted for fresh and as for the squash, look for local winter squash that may be available to you!
To help reduce the cost of the gourmet toasts, we chose toasts with similar ingredients. This way, we can make varying meals throughout the week while using as much of the same ingredients to save money. One example of this is with our Caprese and BAE toast options. They are both avocado based toasts, but all of the ingredients differ. They have very different flavors but by using avocados for multiple toasts we can save money on other ingredients. Another way we worked to reduce the cost was taking advantage of the SNAC pantry when possible. They offer breads and fresh produce that can be used in our toast recipes.
The preparation process may feel the most time consuming, but is essential for an organized and successful cooking outcome. Luckily for you, the mise en place (aka preparation process) of these gourmet toast recipes are simply gathering of the ingredients and cooking tools. For these recipes that means gathering fruits and vegetables, a pot for boiling an egg, as well as cutting boards and knives. Once these items are all called for, the fun begins!
These recipes were so fun and easy to put together. Most of the procedures are pretty self explanatory, just compiling all the ingredients and spreading it out on the toast. The basic skills you need are putting the toast in the toaster, boiling an egg, and correctly measuring out your ingredients. Piece of cake! Or should we say piece of toast!;)
Here are a few cooking tips that might help if you’re a little stuck…
To boil the eggs, in a medium saucepan, add just enough water to cover them. Bring the water to a boil, then set a timer for 10-12 minutes. This will ensure that the yolks are done in the middle. Then, carefully place the boiled eggs in a bowl of ice cold water. This will make them easier to peel and will help them set correctly without turning a pale green color around the yolk.
The Veggie Toast requires veggie curls, which we had never done before, but was a lot easier than it sounds! Start off by filling a bowl with ice water. Wash your vegetables as usual and peel the skin off just the carrot. Then, use your peeler and repeatedly peel one area of the vegetable to get thin strips. They should naturally curl on their own! You can help them curl by rolling them up and sticking them in the water like so….
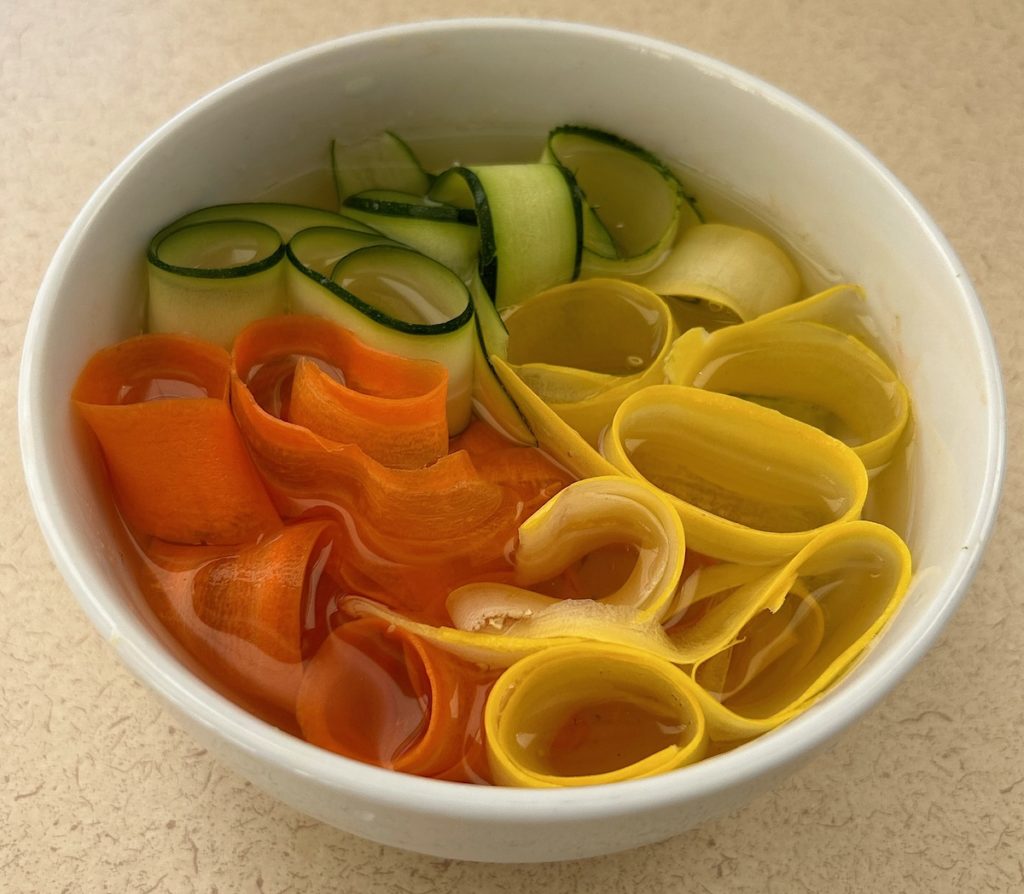
Super easy and looks super cool, right?! We found that the strips peeled from about 1⁄3 into the width of the vegetable were the best looking. Once you’re ready to use the curls, just dry them off with a paper towel, and boom! Perfection!
Reflection of the Process
These toasts turned out great! They were delicious, full of flavor, and looked beautiful. Another thing that we loved about these toasts was that they were very filling and full of nutrition while still being so easy to prepare and easy to find the ingredients.
Keep it budget friendly. If there is an ingredient that is over the top of your budget, find a quick substitute. The options are truly endless when it comes to making this toast. It does not have to come from all one recipe. Also remember, spices and bigger containers will make more than one piece of toast; don’t be too afraid to invest, and whatever you don’t use, great for snacking!
Presentation is HUGE with these toasts. If it looks good, you’ve already won. Here are a few tricks to ensure mouth watering upon looking at, and consuming, your lovely toasts:
- Put a thick layer of your base spread on your toast. No one wants dry toast. This will help it be hearty and enhance the look of all ingredients on top.
- Balance colors! Make the most of the fresh ingredients by spreading out the diverse colors
- Pile up that toast, baby! Your toast should be overflowing with your scrumptious ingredients.
- Don’t be afraid to add those spices. Some of them might be new to you but they add such a good flavor! Especially if you are using all the ingredients, you’re going to want a good amount of spice.
- SERVE IMMEDIATELY. No one likes to bite into a rock instead of toasted bread.
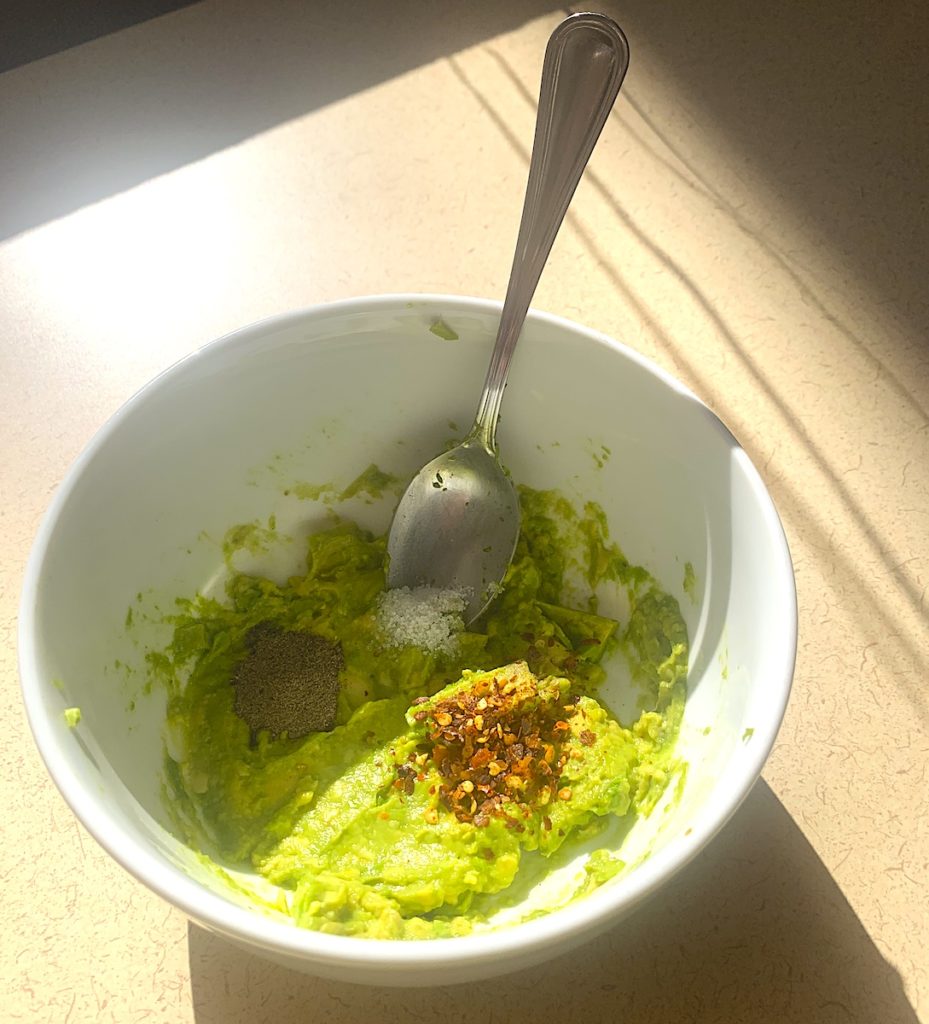
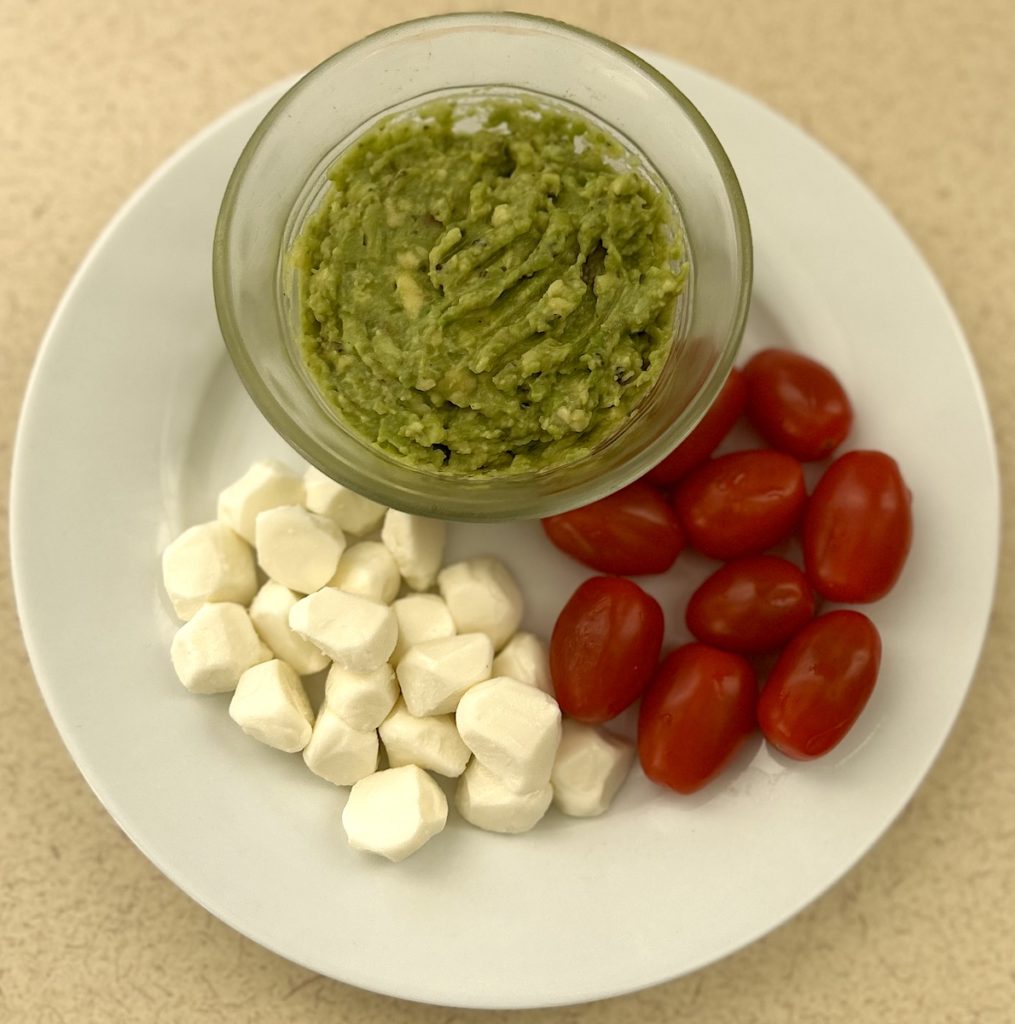
Here are some photos to use as guidelines for how you can top the toasts. This recipe is so fun because it allows you to be CREATIVE. Change it up! Add your own pazazz! Let us know how it goes in the comments!
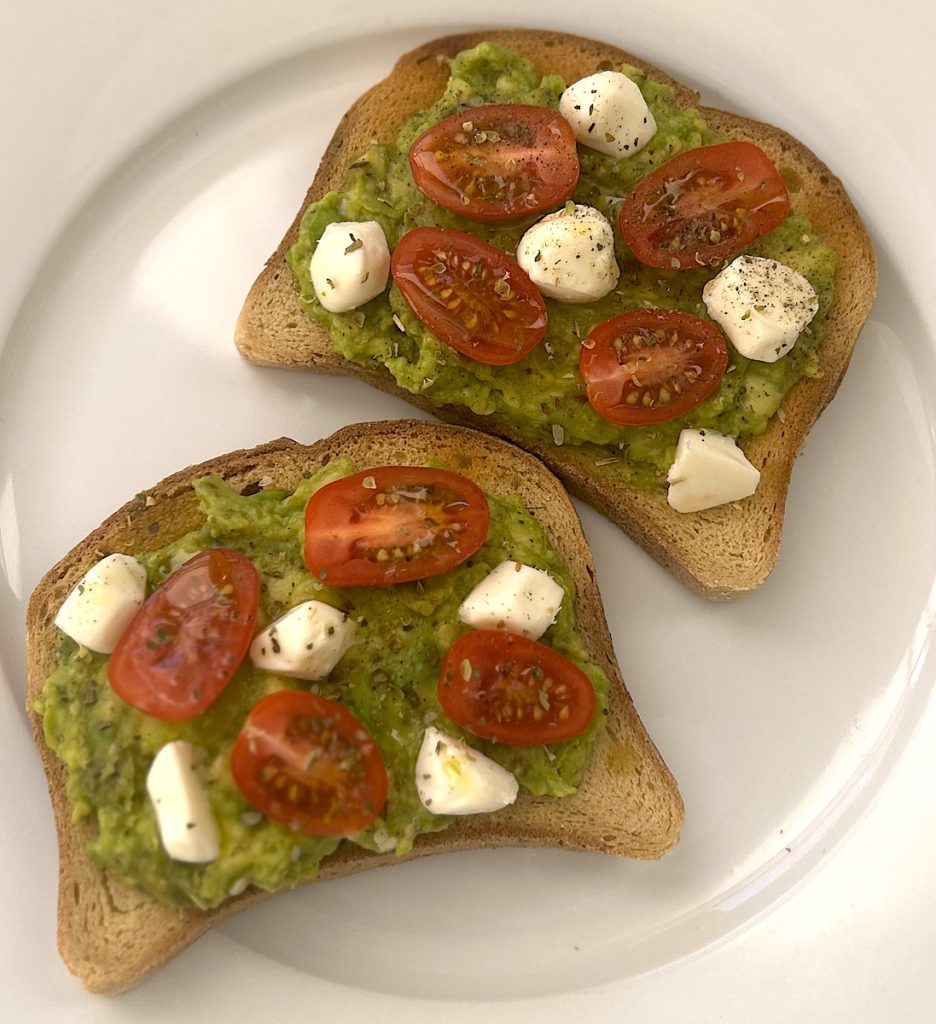

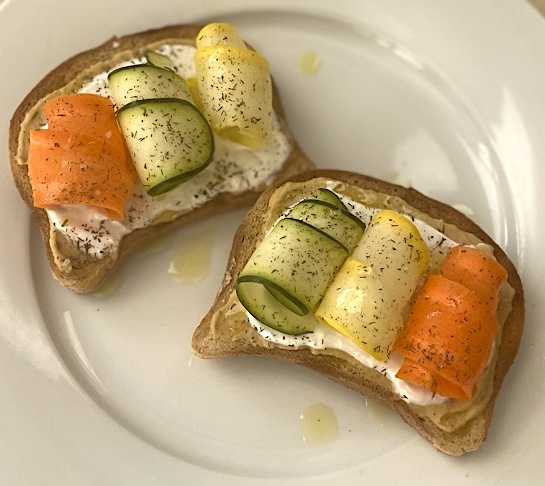
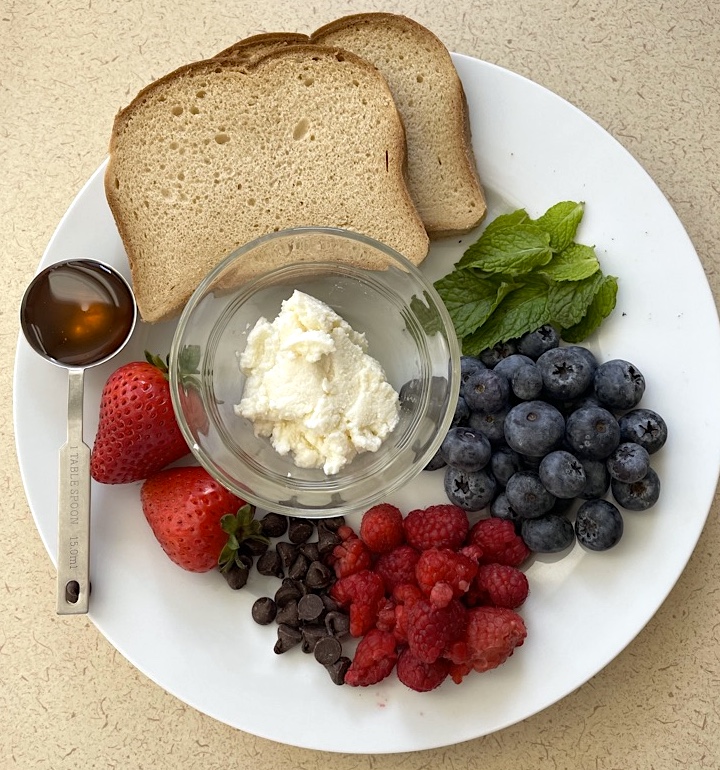
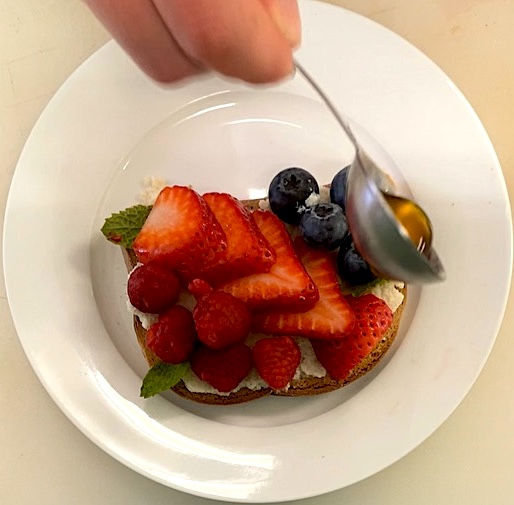
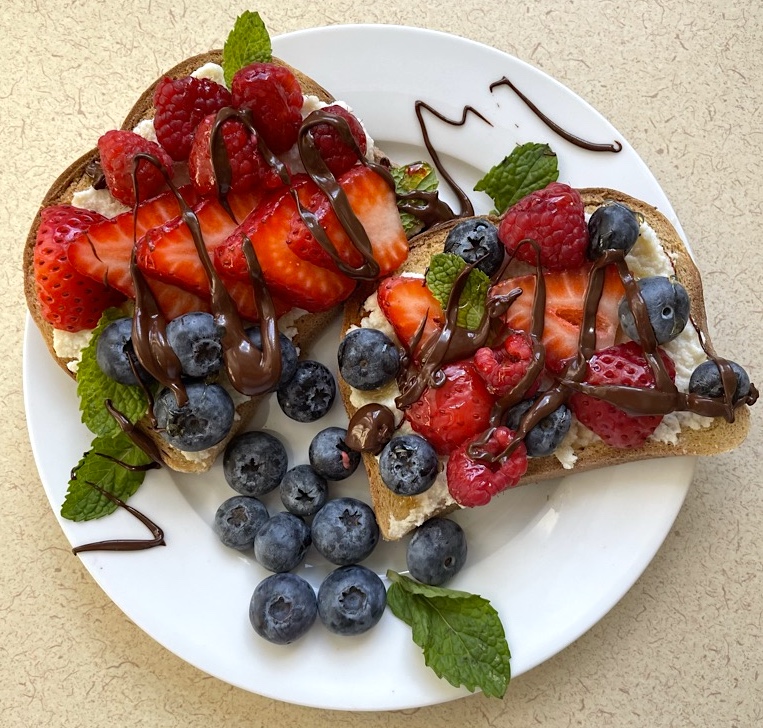
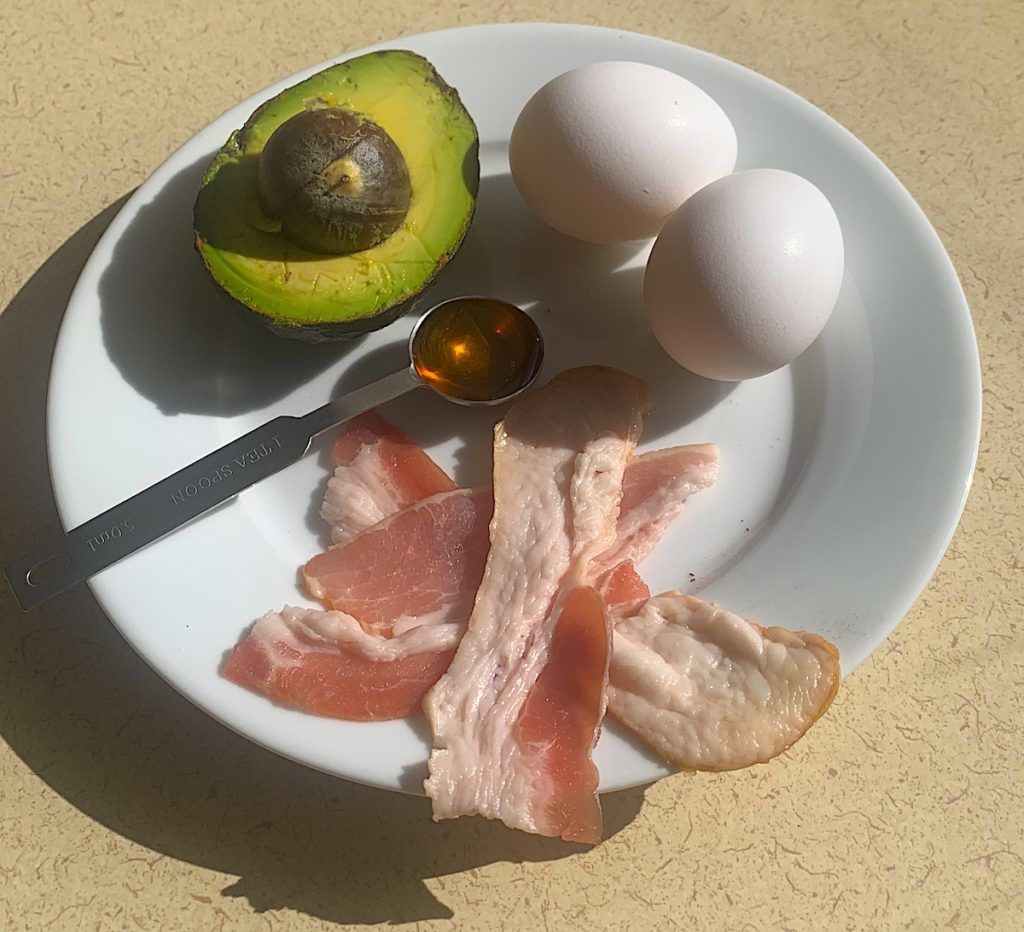
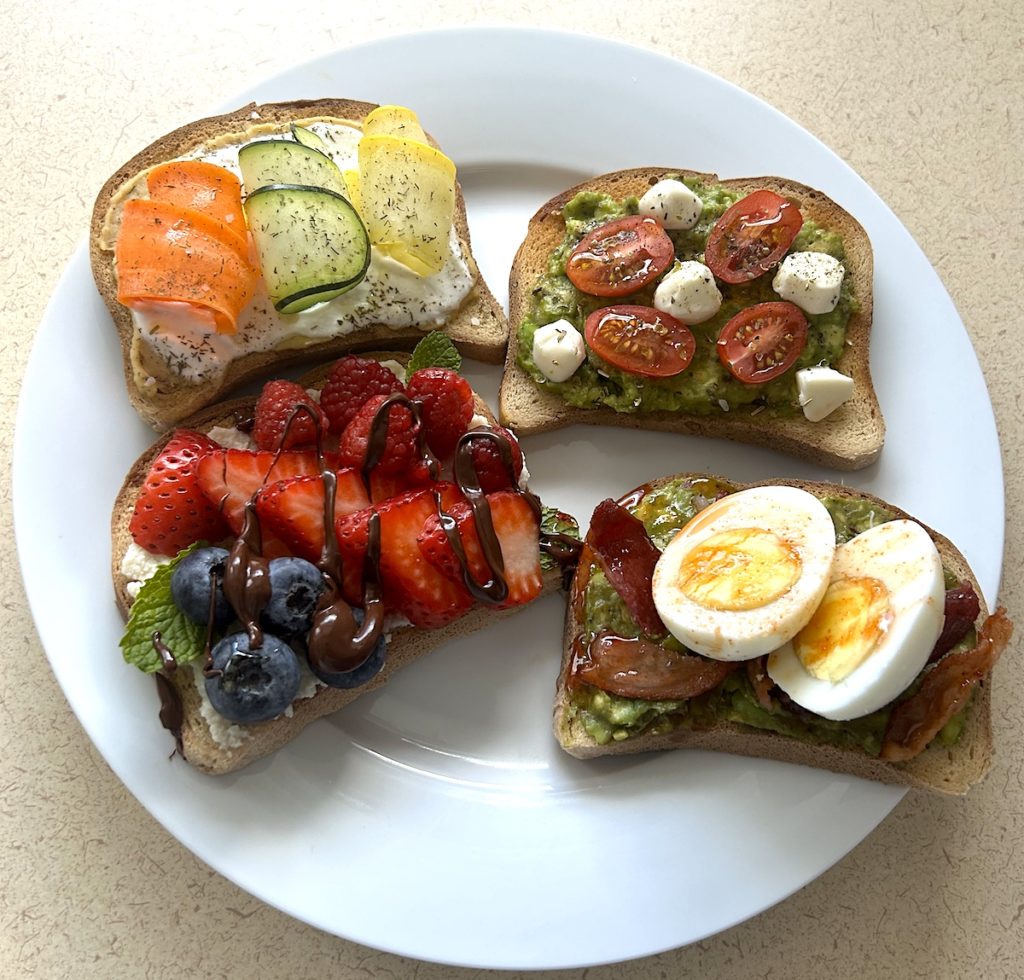
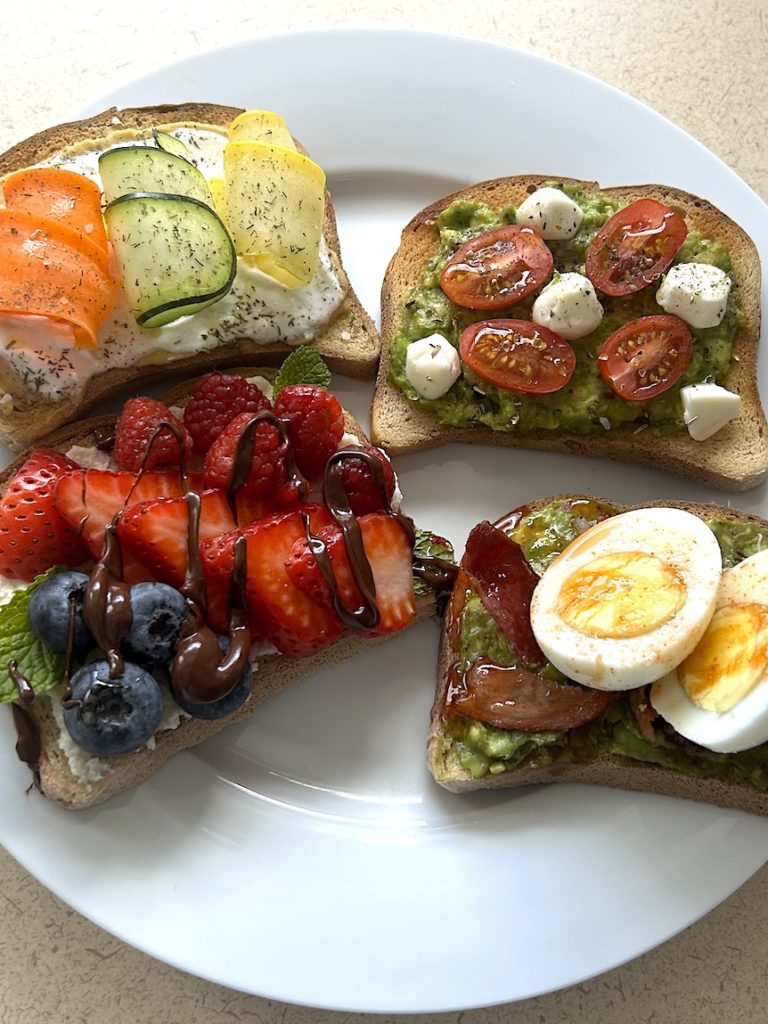
Gourmet Toasts
Description
This recipe is a great and versatile option for anyone looking to spruce up a simple meal. It takes a simple piece of bread and then adds other ingredients to not only increase flavor but the nutritional profile
Ingredients
BAE Toast
Caprese Toast
Berry Toast
Veggie Curls Toast
Instructions
- BAE Toast: In a bowl smash the avocado with the salt, pepper and red
pepper flakes; set aside. In a separate bowl, whisk together the honey and sriracha. On each slice of toast spread some of the smashed avocado. Add 2 halves of the egg on top, some chopped bacon and finish with a drizzle of sriracha honey sauce. - Caprese Toast: In a bowl smash the avocado with the dried basil, oregano,
kosher salt, and black pepper; set aside. On each slice of toast spread some of the Italian smashed avocado. Place 3-4 bocconcini balls, and 2-3 grape tomato halves. Finish each toast with a pinch of dried basil/oregano/kosher salt/pepper, a garnish of micro basil, and a drizzle of extra virgin olive oil. - Berry Breakfast Toast: In a food processor add the ricotta, 1 teaspoon of honey, and vanilla bean extract. Process until smooth and creamy; set aside. On each slice of toast spread out the sweetened ricotta, top with
fresh berries. Finish with a drizzle of honey and a garnish of
mint. - Veggie Curls Toast: On each slice of toast spread out the hummus. Next gently smear on some of the Greek yogurt. To each slice of toast add a ribbon of each vegetable, sprinkle with a pinch of herbs and finish it with a drizzle of extra virgin olive oil..
Young women of this age group seem to be even more susceptible to an unhealthy focus on weight and appearances.1 It is important to remember that young women are in the prime of their hormonal fluctuations, which means they put on water prior to menstruation and take water off postmenstrual.2 This does not always indicate an unhealthy weight gain, and young women should try to remember that it is normal to go through these cycles each month. It may take some hard work and practice, but building some simple habits may take your focus away from these thoughts. For example, try to avoid negative body talk – about yourself and others – and try to focus on your positive characteristics. Try to take a break from social media and spend time doing things you like, such as reading or going for a walk.3
These changes are not always a sign that something is wrong. They are a normal part of becoming an adult. The added weight often supports metabolic, hormonal, and physical stability as you move out of adolescence and toward adulthood.
It is also important to acknowledge that weight gain during this time can be influenced by factors like a slower metabolism, which naturally decreases with age.4 Pair this natural change with a college lifestyle – less structured meals, late-night snacking, and potentially less physical activity – and the numbers on the scale may change. However, this is no reason to panic. Instead, it is a reminder to focus on building sustainable habits that support your health long-term.
While physical changes are normal, the societal pressure to stay a certain size or achieve a “perfect” body may be overwhelming for some young adults. College is often a time when body image concerns peak, as students compare themselves to peers or feel insecure about themselves. Individuals with the risk or diagnosis of eating disorders may be even more negatively impacted.5 Some individuals may take extreme measures to avoid gaining weight, which could cause even further problems.
The truth is, your body is meant to change. It is adapting to meet your evolving needs. A positive body image doesn’t necessarily mean loving every single detail about how you look. It means appreciating your body for what it does for you. Think of all the amazing things your body does every day! Instead of focusing on aesthetics, think more about how your body allows you to walk across campus over and over, hug your friends, or fuel your brain during a tough study session.
Rather than fixating on weight as a measure of health, aim to establish habits that nourish your body and mind. Eating a variety of nutrient-dense foods, staying active in enjoyable ways, getting enough sleep, and managing stress are important for long-term well-being. These habits not only help you feel good physically, but also promote a sense of self-worth that isn’t tied to the number on the scale.
College is a time for growth – not just intellectually, but also physically and emotionally. By embracing the natural changes in your body and focusing on what makes you feel strong, capable, and energized, you’ll set yourself up for a lifetime of health and self-confidence.
References:
- Mizia S, Felińczak A, Włodarek D, Syrkiewicz-Świtała M. Evaluation of Eating Habits and Their Impact on Health among Adolescents and Young Adults: A Cross-Sectional Study. Int J Environ Res Public Health. 2021 Apr 10;18(8):3996. doi: 10.3390/ijerph18083996
- Opsahl K. Facts don’t confirm lore about ‘Freshman 15’ weight gains. The Herald Journal. 2013 Sept 28. https://www.hjnews.com/news/facts-don-t-confirm-lore-about-freshman-15-weigh-gains/article_15a1a310-28b0-11e3-988c-001a4bcf887a.html
- Victoria State Government Department of Health. Body image – women. Better Health Channel. 2023 Feb 16. https://www.betterhealth.vic.gov.au/health/healthyliving/body-image-women
- Jones L. How to avoid the ‘Freshman 15.’ Hard News Cafe. 2008 Apr 9. https://www.usu.edu/today/story/how-to-avoid-the-freshman-15
- Kent S. ‘Freshman 15’ myth busted by new study. The Utah Statesman. 2011 Nov 13. https://usustatesman.com/freshman-15-myth-busted-by-new-study/
- Alone Cute Teenager Girl At Mirror In Living Room At Home Looking Her Sad Lonely Child Stands And Looks In His Reflection In Casual Domestic Clothes Concept
- https://unsplash.com/s/photos/mirror-body-image-little-girl
College students, and adults in general, often gravitate toward fast food and processed snacks because they’re convenient and cheap. However, these options are typically high in added sugar, unhealthy fats, and low-quality carbohydrates.2 Though these foods might provide a quick energy boost, they often lead to blood sugar spikes and crashes, leaving you feeling sluggish and unfocused. If you choose to go out for lunch or dinner, try to order the better choices, such as low-fat or low-sodium options, or whole-grain breads.3
Sugary drinks, like sodas and energy drinks, can also seem like an easy fix for staying awake during late-night study sessions. They can disrupt your focus by causing dehydration and energy crashes, making it harder to retain information.3 Although in the long run it will be beneficial to opt for more nutrient-dense foods, this doesn’t mean that the occasional cookie or soda isn’t always bad. A good rule of thumb is the “90-10” or “80-20” rule, which emphasizes that nutrition should be about variety, moderation, and balance.3
Alcohol and smoking are often part of the college social scene, but too much can have immediate and long-term effects on academic performance and health, including weight gain.1,4 Alcohol disrupts sleep quality, leaving you tired and less able to concentrate the next day. It also impairs memory and decision-making, which can hurt your ability to perform on tests and assignments. Like with general nutrition, finding a balance is key. Moderation and planning can help you keep your focus on your academic goals.
Lack of sleep is a common issue among college students, and one that can directly affect your cognitive function. Without adequate sleep, you might lose the ability to focus, problem-solve, and retain information. Sleep deprivation also disrupts hunger-regulating hormones like leptin and ghrelin, which can lead to overeating and poor food choices, further compounding the problem.5
On the other hand, regular physical activity can significantly boost your academic performance, as well as your physical and mental health. Exercise increases blood flow to the brain, enhances memory, and reduces stress.1 You don’t necessarily have to go to the gym and run on the treadmill and lift weights every day. Even short, time-saving workouts, like a 20-minute walk around the block or a quick bodyweight routine, can help clear your mind and boost your energy for studying.
Many students might find themselves falling into the trap of dieting or disordered eating, whether on purpose or by consequence of their routines. These habits can lead to nutrient deficiencies, low energy, and even binge eating episodes, which can subsequently harm both physical and mental health.6 Combine this with typical academic stress, and the effects are magnified. Low energy, irritability, and decreased productivity become everyday struggles. So instead of focusing on restrictive diets, try to aim for balance by incorporating a variety of foods and emphasizing whole, nutrient-dense options.
Maintaining stable blood sugar levels is critical for consistent energy and mood. Skipping meals or eating highly processed foods can lead to crazy blood sugar levels, which might make you feel tired, irritable, or anxious.3 These mood swings can affect your ability to focus during lectures or study sessions, ultimately impacting your grades. To keep your blood sugar stable, try to eat balanced meals that include protein, healthy fats, and complex carbohydrates.
The good news is that you don’t have to overhaul your entire lifestyle to see improvements. Small, consistent changes can make a big difference. Try to focus on planning meals ahead, and being sure to drink enough water so you can stay hydrated and energized. Make it a point to move daily, even if it is just walking between classes. Focus on prioritizing sleep by creating a bedtime routine and limiting caffeine intake.
It is crucial that college students understand that how you respond to the challenges of college will set the framework for your health, both short-term and long-term.7 By making mindful choices, you’ll not only feel better physically but also improve your academic performance. Remember, success in college is about balance: investing in your health now will pay off in the long run, both in your studies and beyond.
References:
- Kent S. ‘Freshman 15’ myth busted by new study. The Utah Statesman. 2011 Nov 13. https://usustatesman.com/freshman-15-myth-busted-by-new-study/
- Wengreen HJ, Moncur C. Change in diet, physical activity, and body weight among young-adults during the transition from high school to college. Nutr J. 2009 Jul 22; 8:32. doi:10.1186/1475-2891-8-32
- Jones L. How to avoid the ‘Freshman 15.’ Hard News Cafe. 2008 Apr 9. https://www.usu.edu/today/story/how-to-avoid-the-freshman-15
- Vadeboncoeur C, Townsend N, Foster C. A meta-analysis of weight gain in first year university students: is freshman 15 a myth? BMC Obesity. 2015; 2(22). https://doi.org/10.1186/s40608-015-0051-7
- Cleveland Clinic. Ghrelin. Body Systems & Organs. 2022 Apr 21. https://my.clevelandclinic.org/health/body/22804-ghrelin
- Mizia S, Felińczak A, Włodarek D, Syrkiewicz-Świtała M. Evaluation of Eating Habits and Their Impact on Health among Adolescents and Young Adults: A Cross-Sectional Study. Int J Environ Res Public Health. 2021 Apr 10;18(8):3996. doi: 10.3390/ijerph18083996
- The Freshman 15: Myth or Reality? The Dietitian’s Digest. 2013 Sept 1. https://thedietitiansdigest.org/2013/09/01/the-freshman-15-myth-or-reality/
- https://unsplash.com/s/photos/food-brain

